You spend money on Google Ads. A form gets filled in. A customer phones. But Google has no idea which ad caused it, so it can't learn what works.
A conversion action fixes that. It's a tracker you create in Google Ads. SmartFlow then tells Google every time a lead, order or call comes from one of your ads. Google uses that to put your budget where it pays off.
There are two parts. First you create the tracker in Google Ads. Then you build a short workflow in SmartFlow that feeds it.
Check these three things first. They save a lot of head-scratching later.
Google Ads reporting is set up in your SmartFlow account.
The right MCC ID and Google ID are linked to your location. The MCC ID is your Google Ads manager account. The email address linked to it needs admin-level permissions in Google Ads.
The UTM tracking template is added to your Google Ads account. This is a small piece of text that tags your ad links, so SmartFlow can see where each visitor came from. Add it in one place only: account settings, campaign settings or ad level. Not all three.
Not sure about any of these? Message our support team before you carry on.
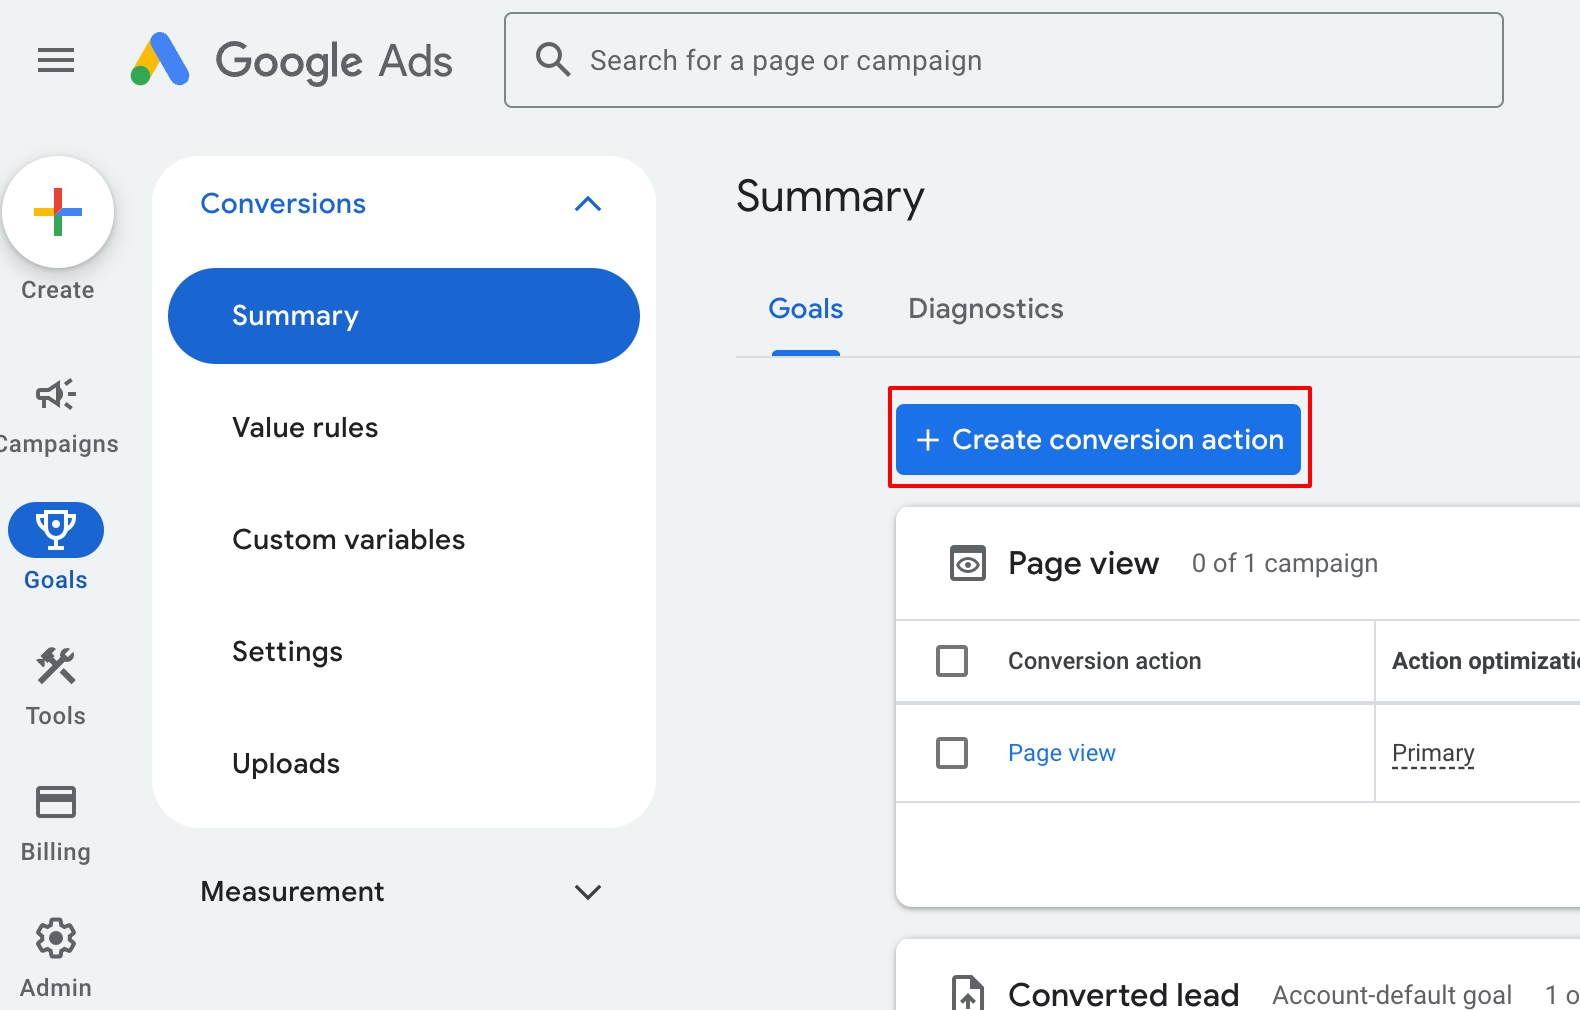
In Google Ads, go to Goals and click Conversions, then Summary.
Click + Create conversion action. You can also click the Create button at the top left and choose Conversion action.
Choose Conversions offline.
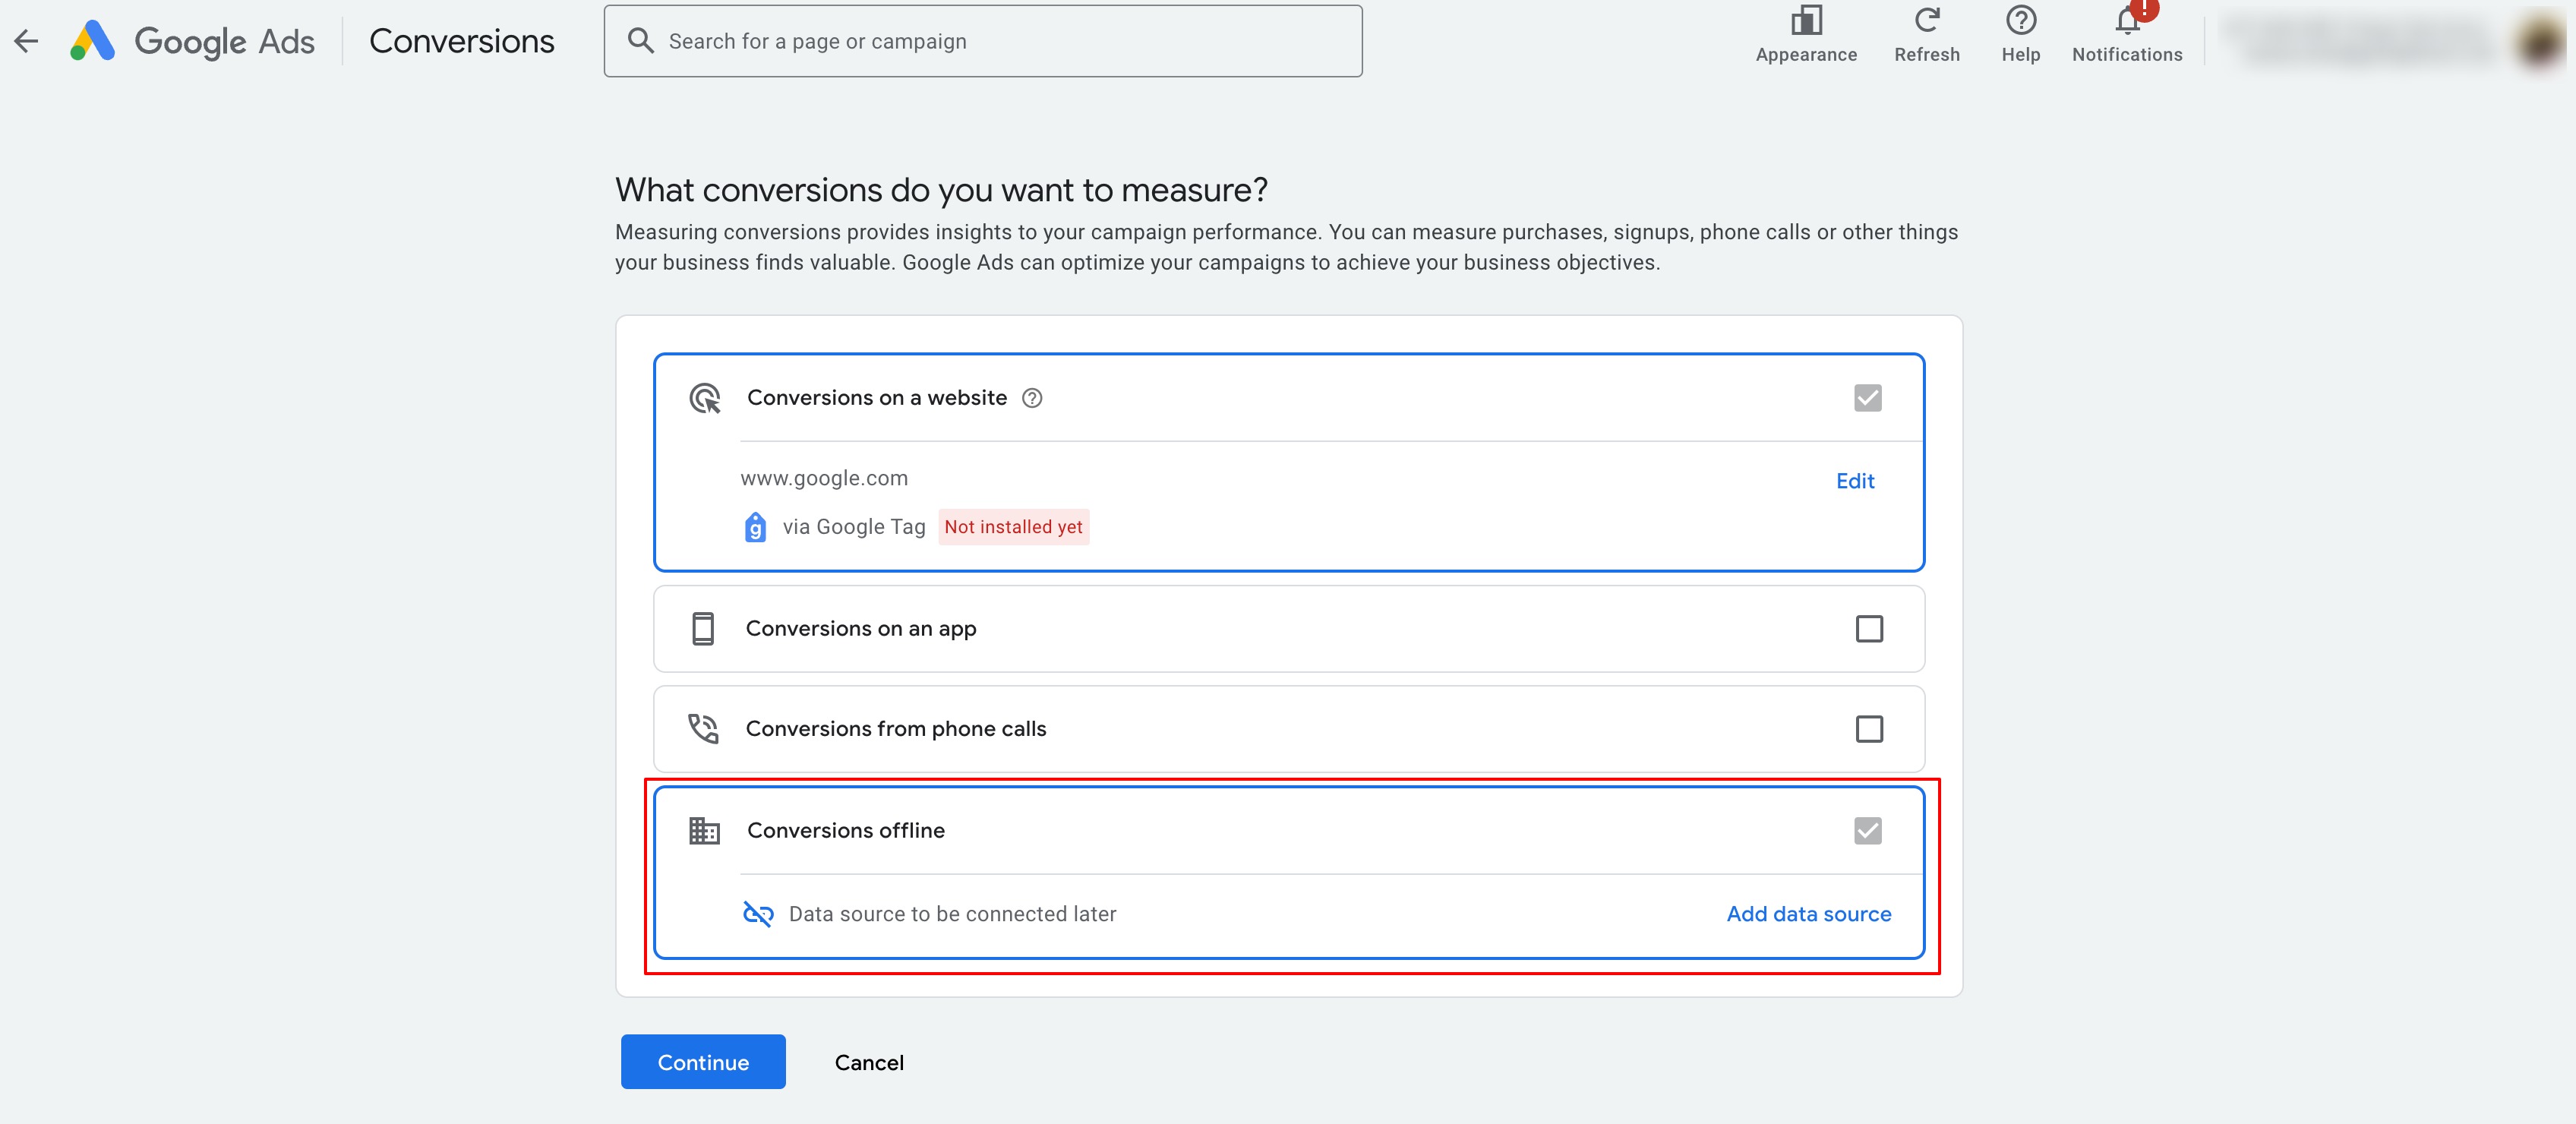
Click Add data source, then choose Skip this step and set up a data source later.
Under "What do you want to measure?", select Converted lead.
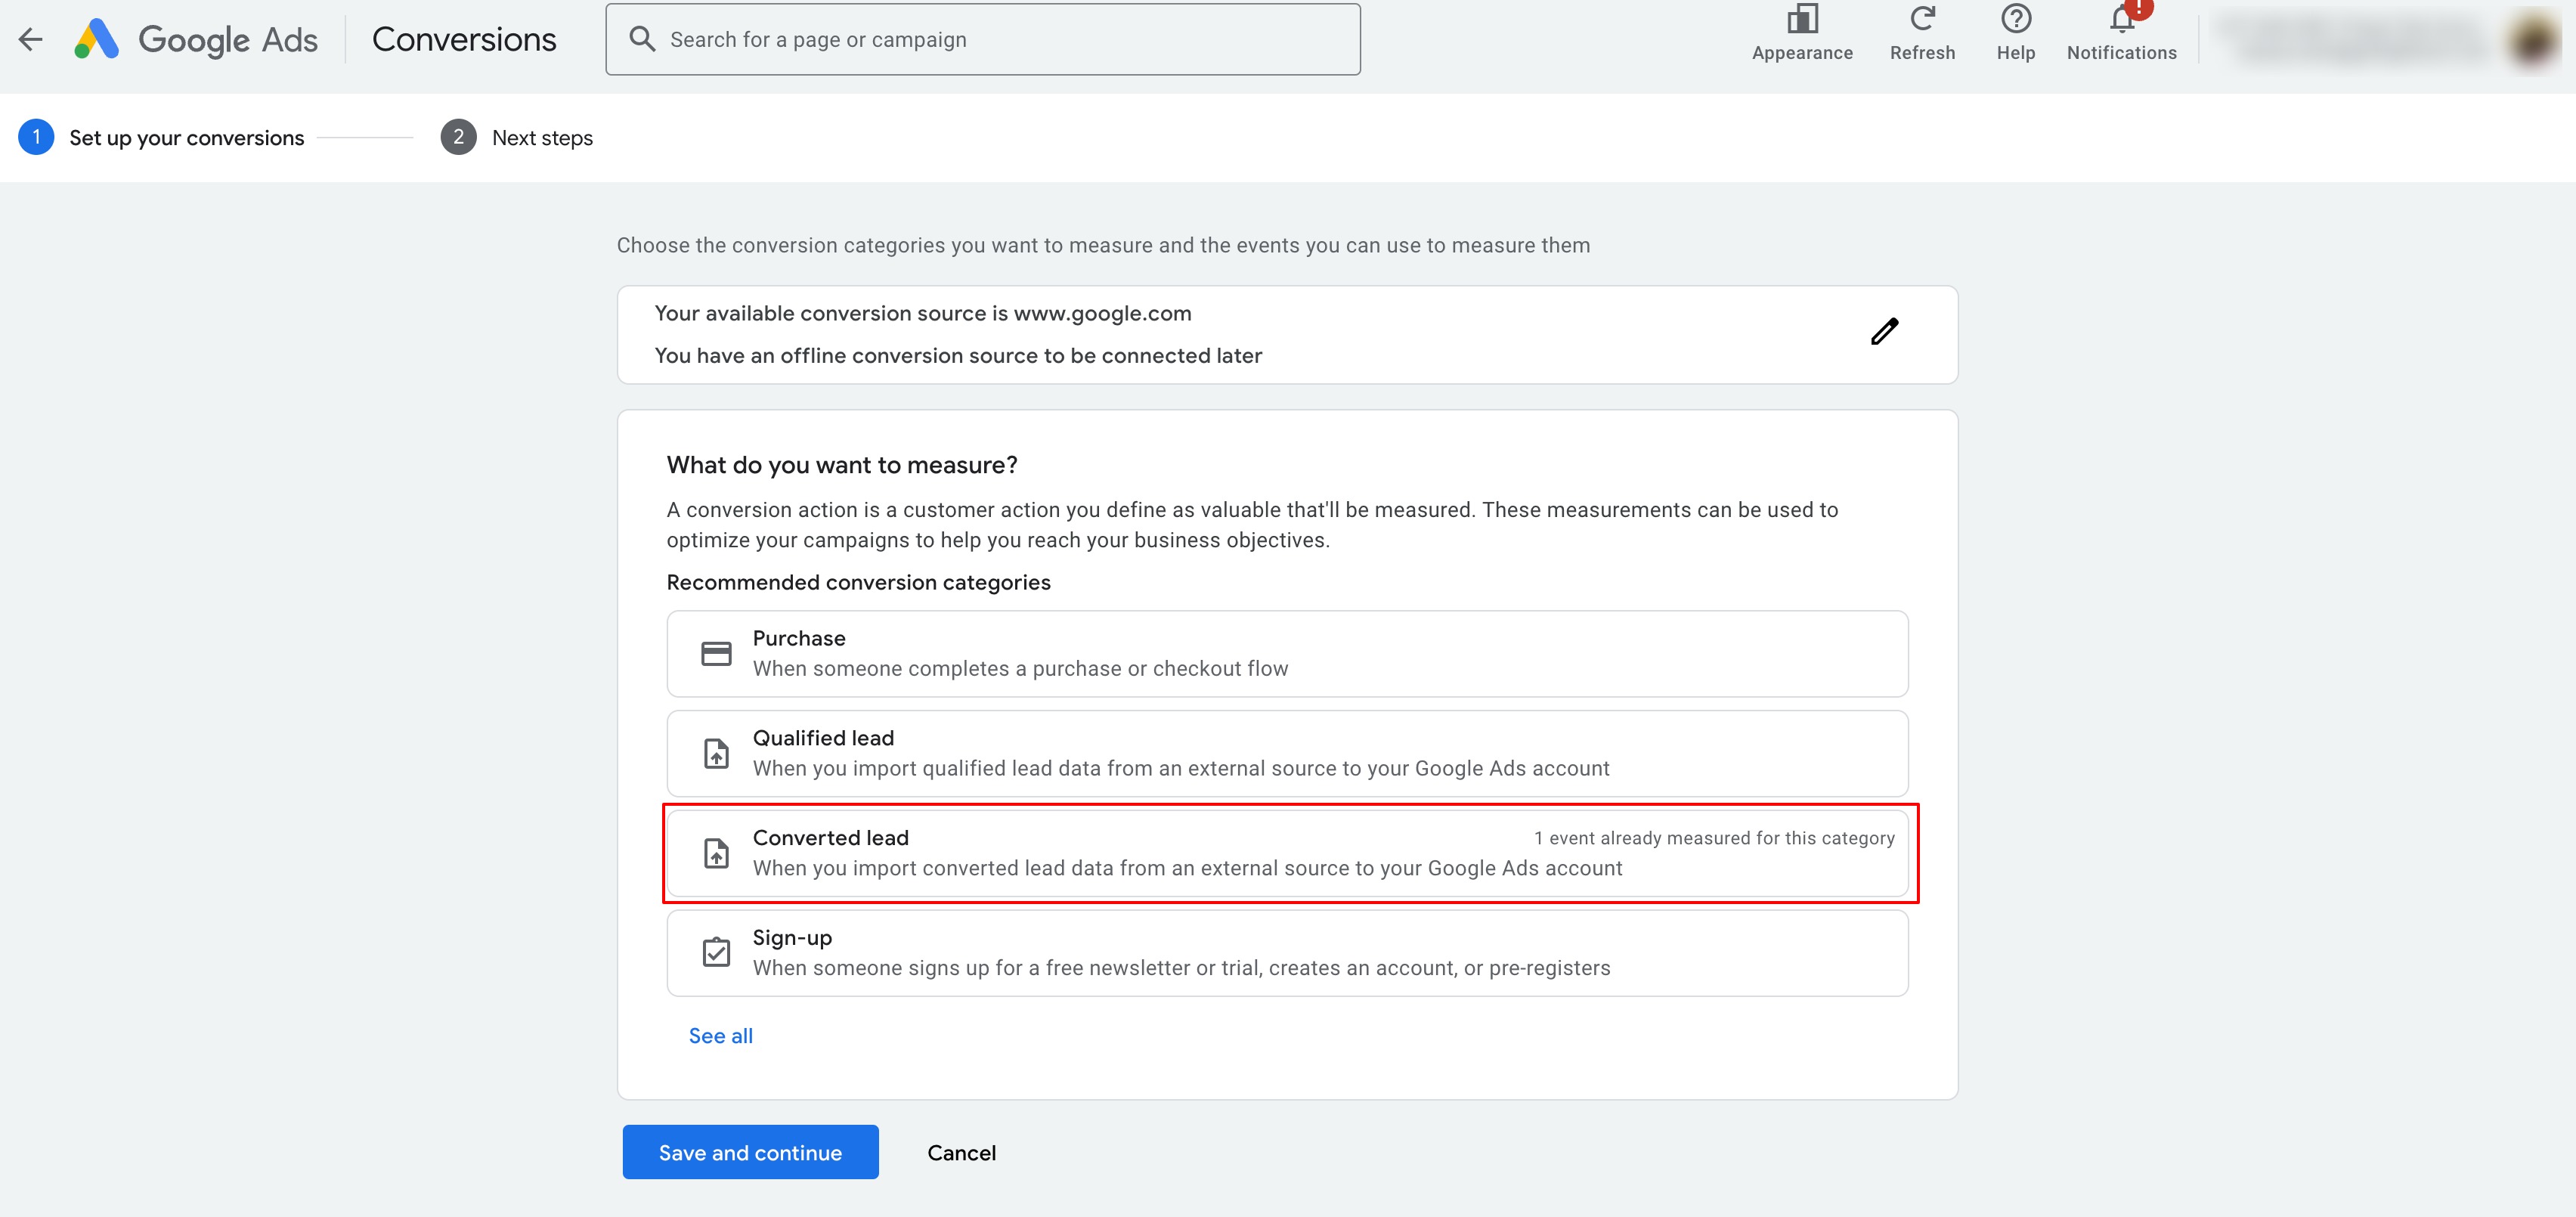
Add an event to the category.
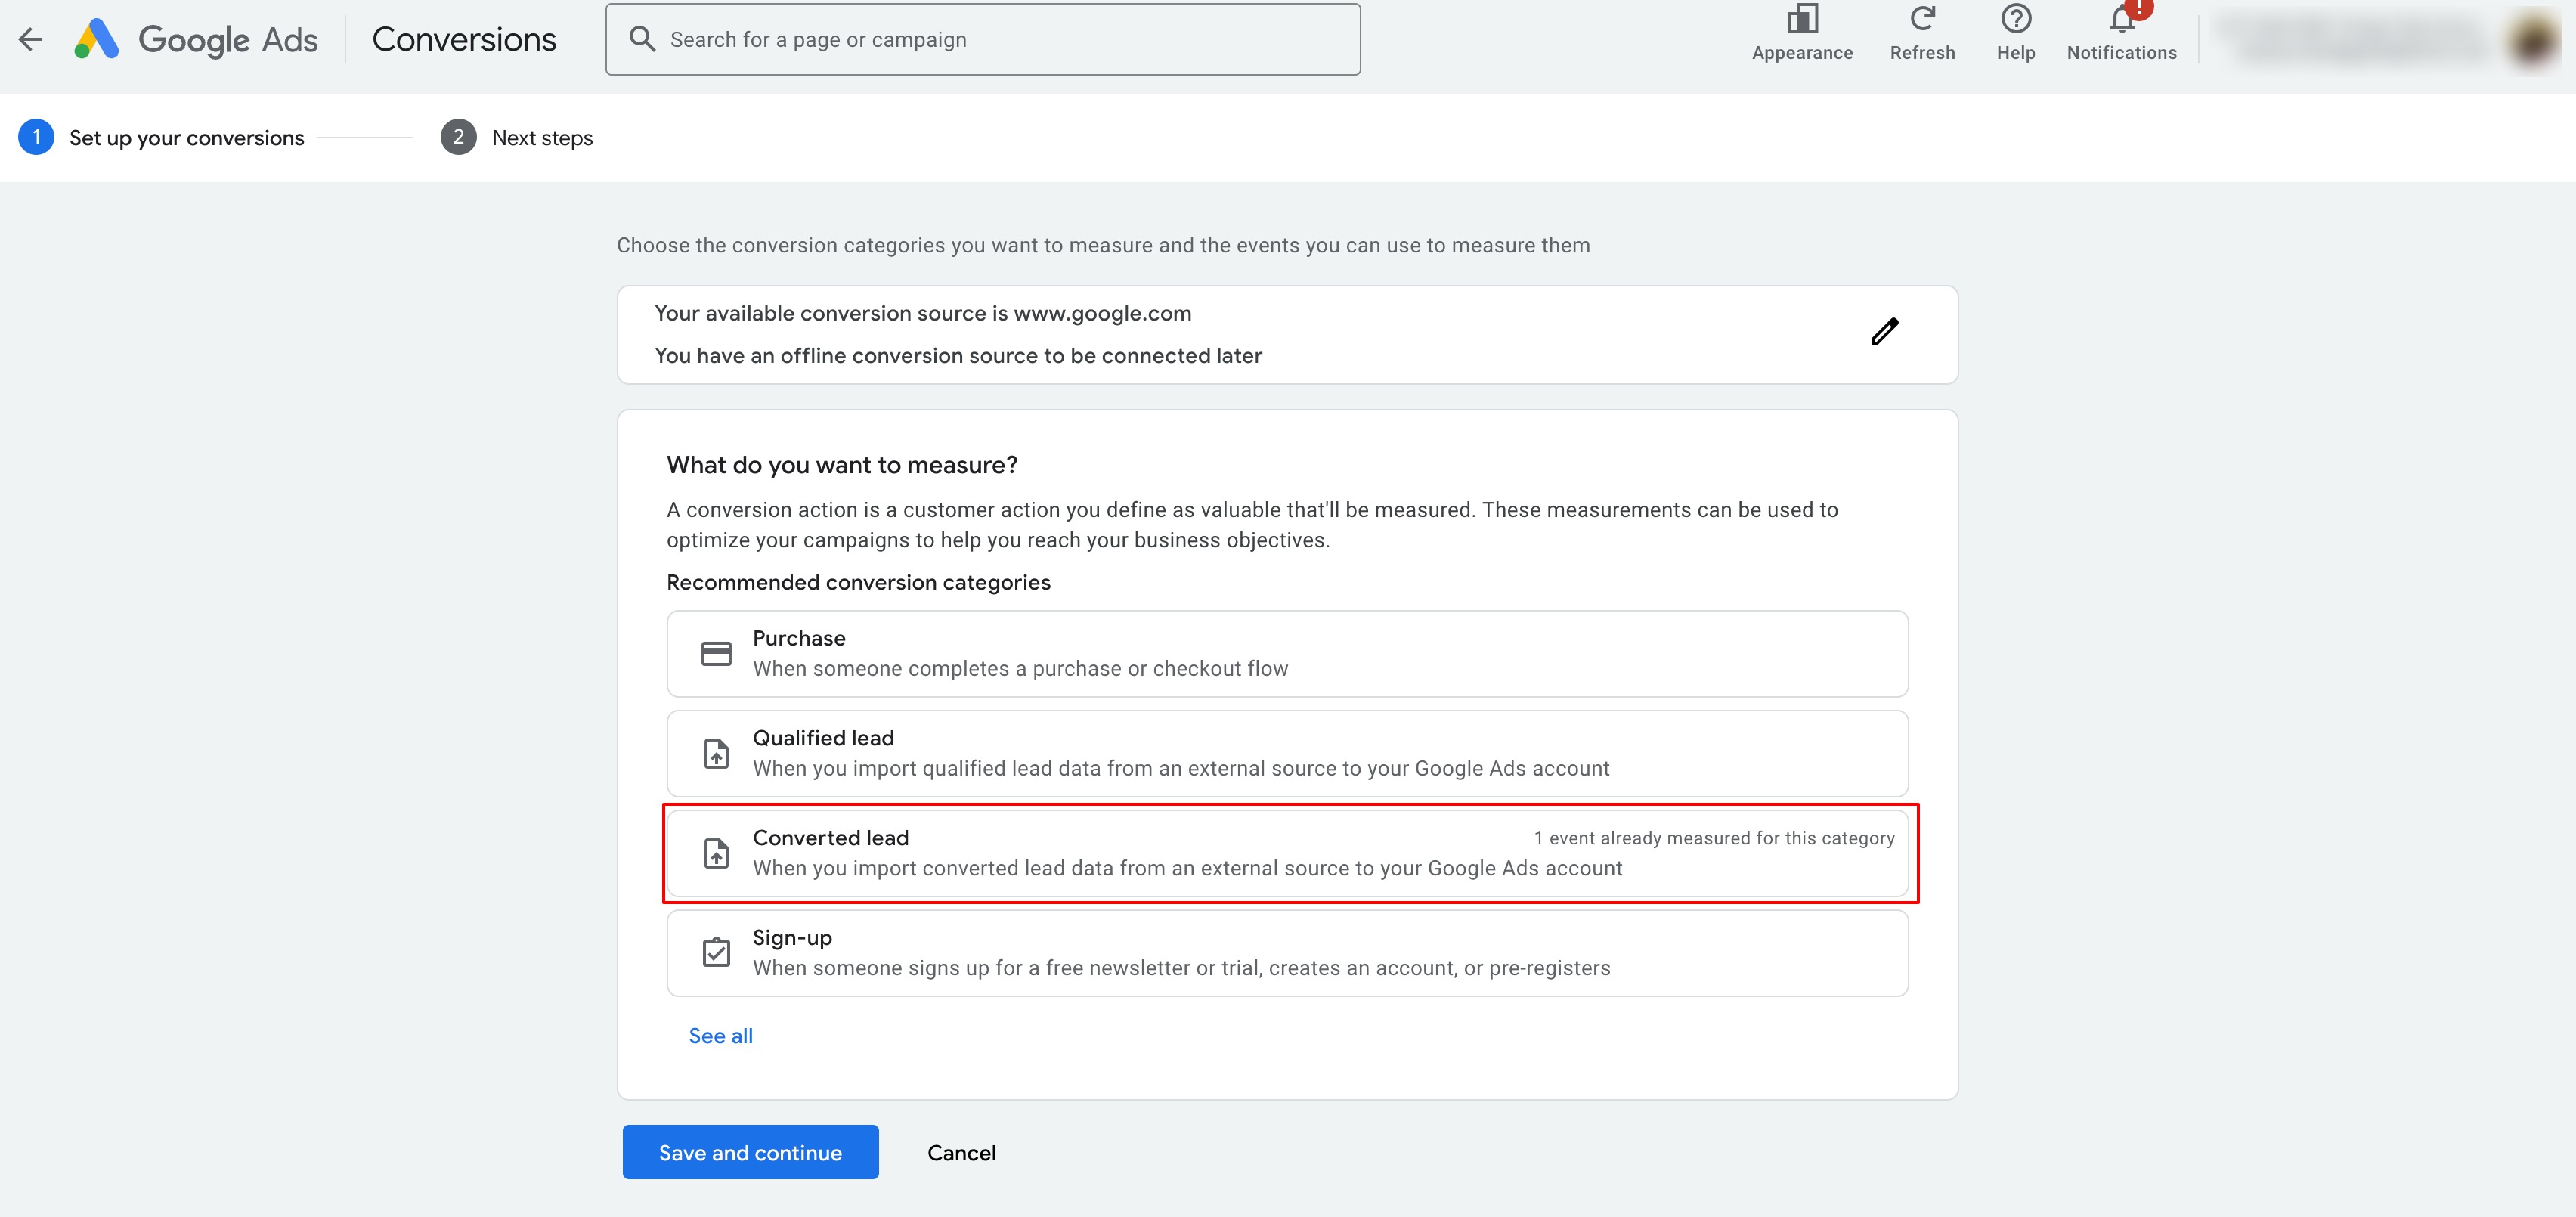
Select Offline data sources.
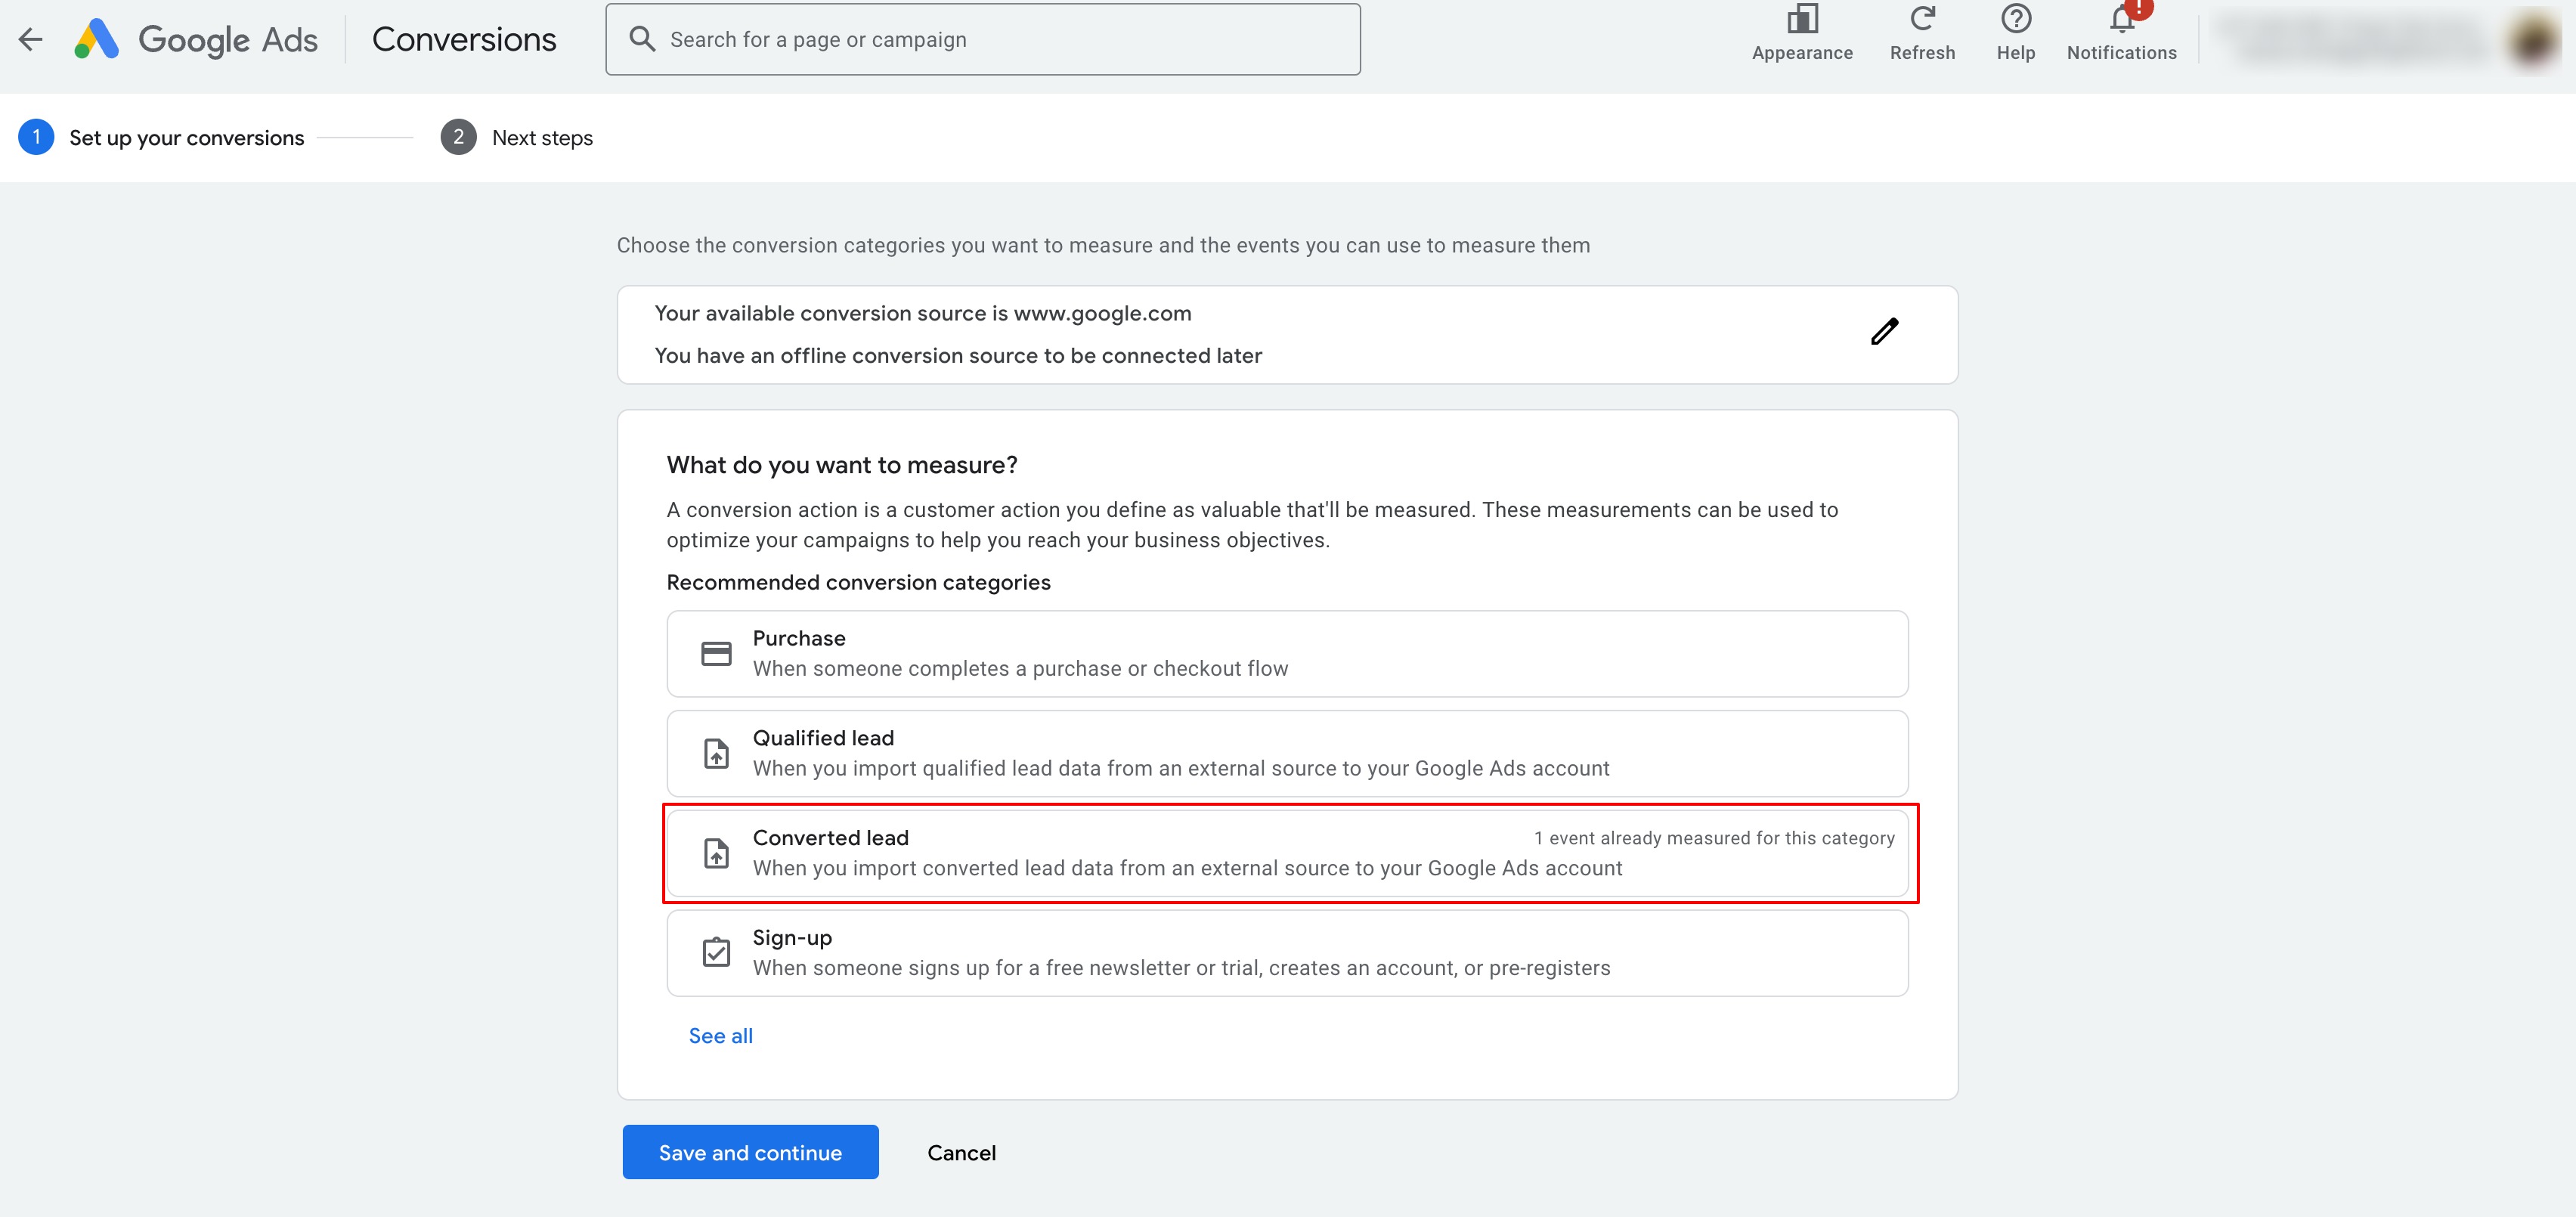
Open the Conversion source settings.
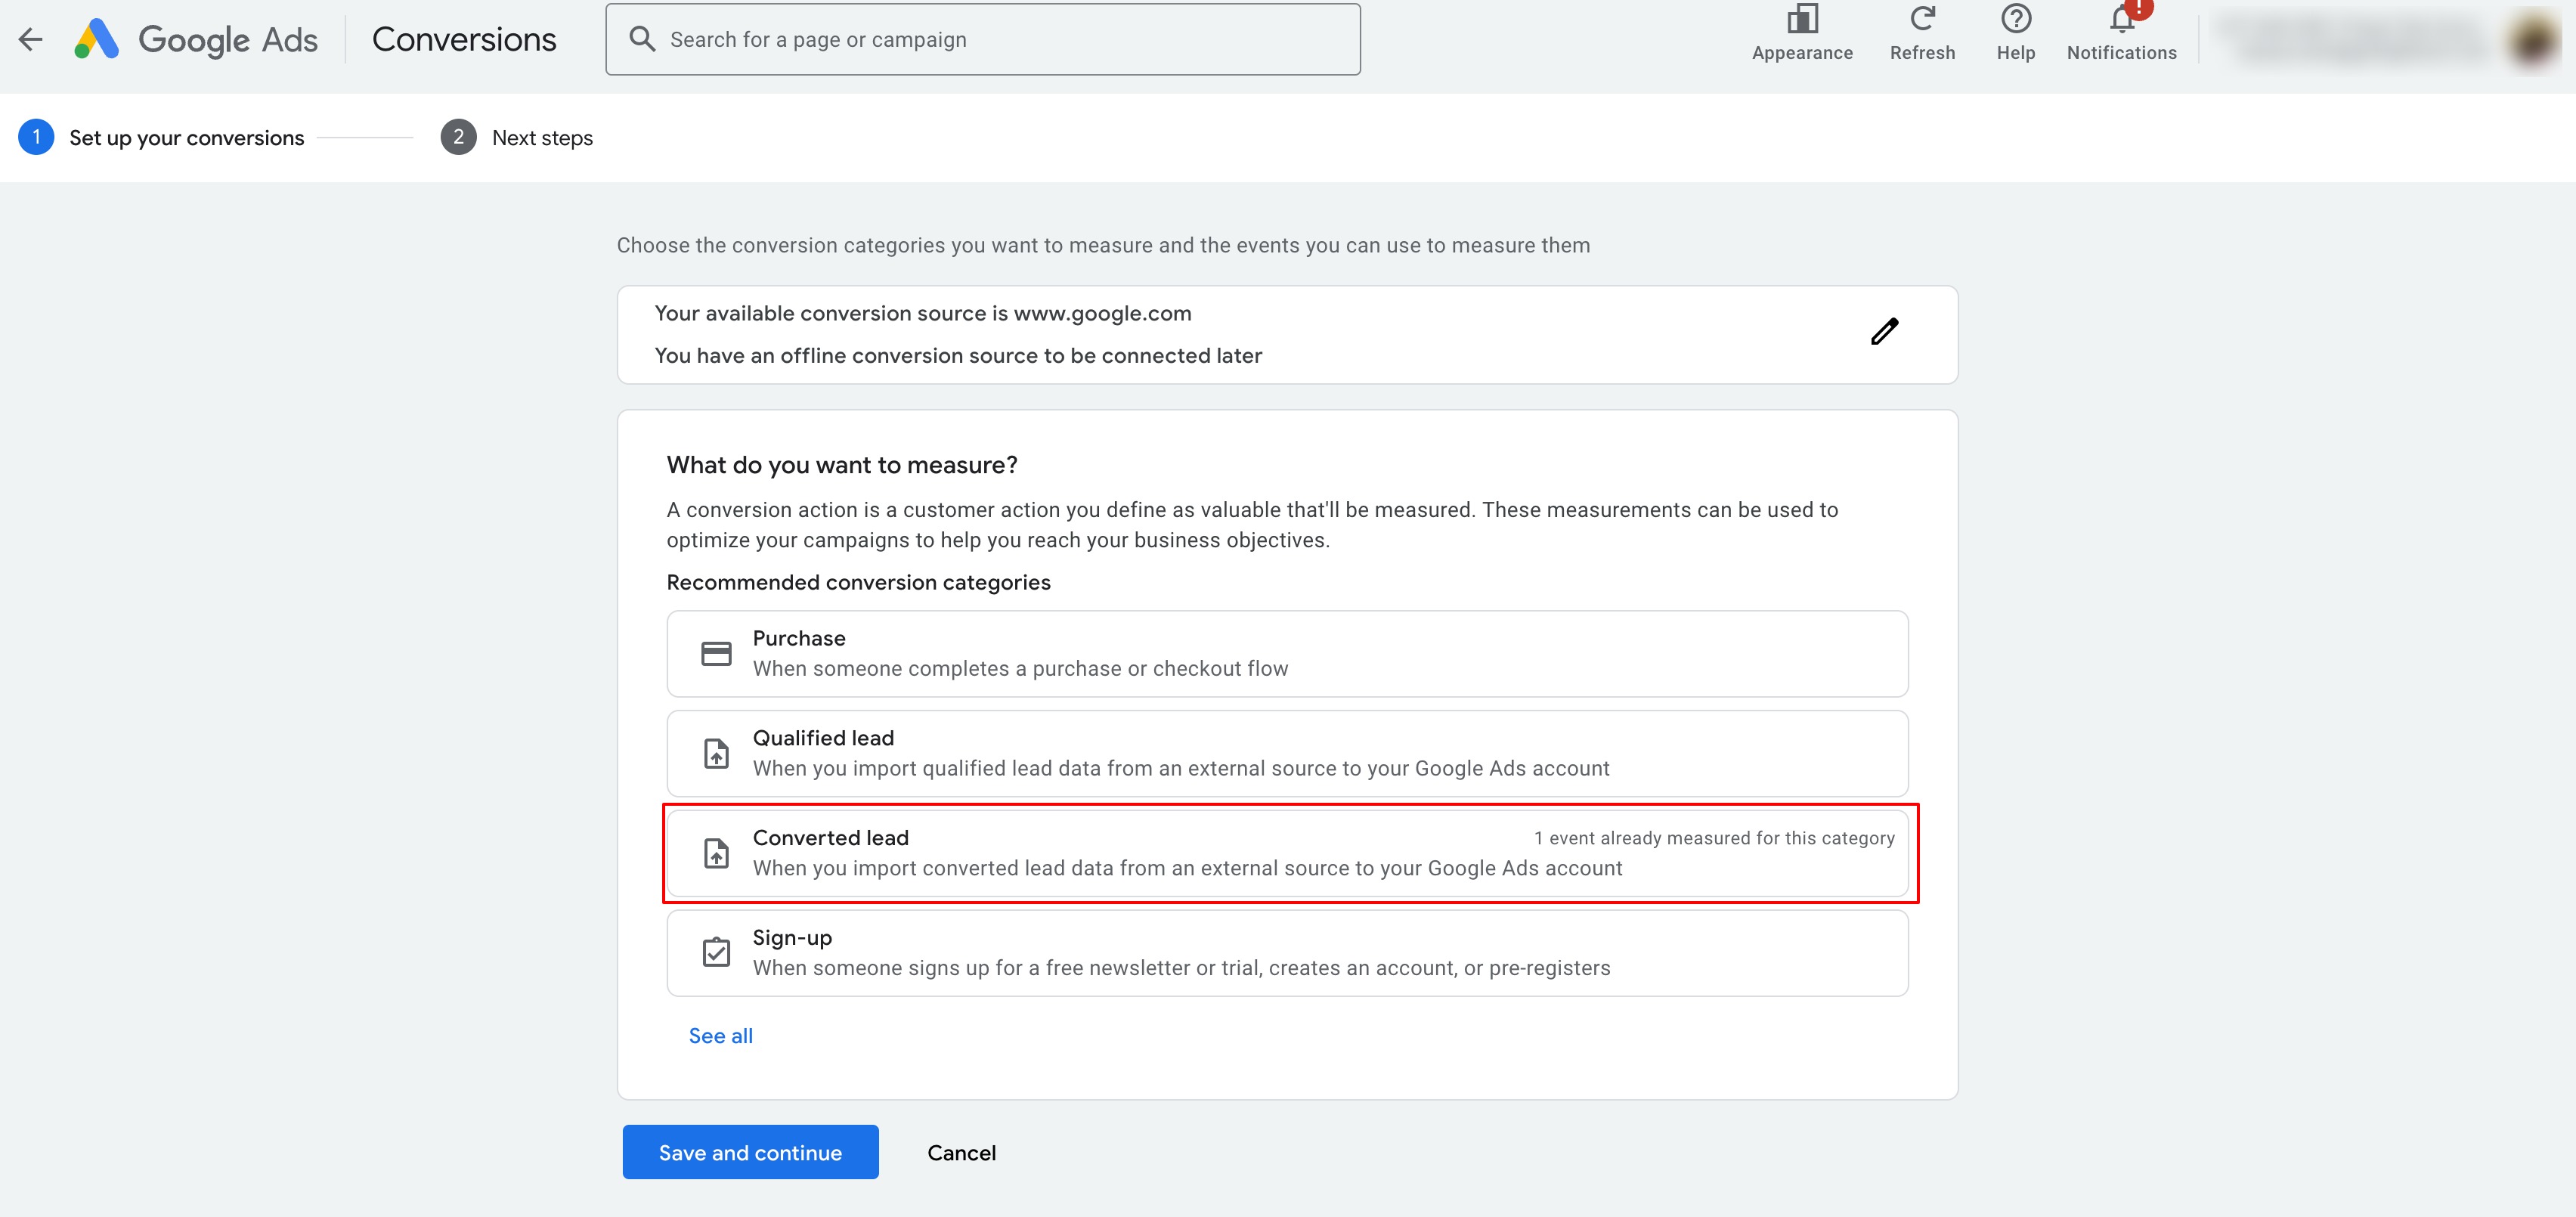
In the action optimisation section, tick Primary action used for bidding optimisation. This tells Google to chase more of these conversions when it spends your budget.
Give the conversion a name you will recognise, such as "Website enquiry". Then copy it and save it somewhere. You need this exact name in Part 2.

Choose whether to use the same value for every conversion, different values, or no value. Google explains the options on the screen.
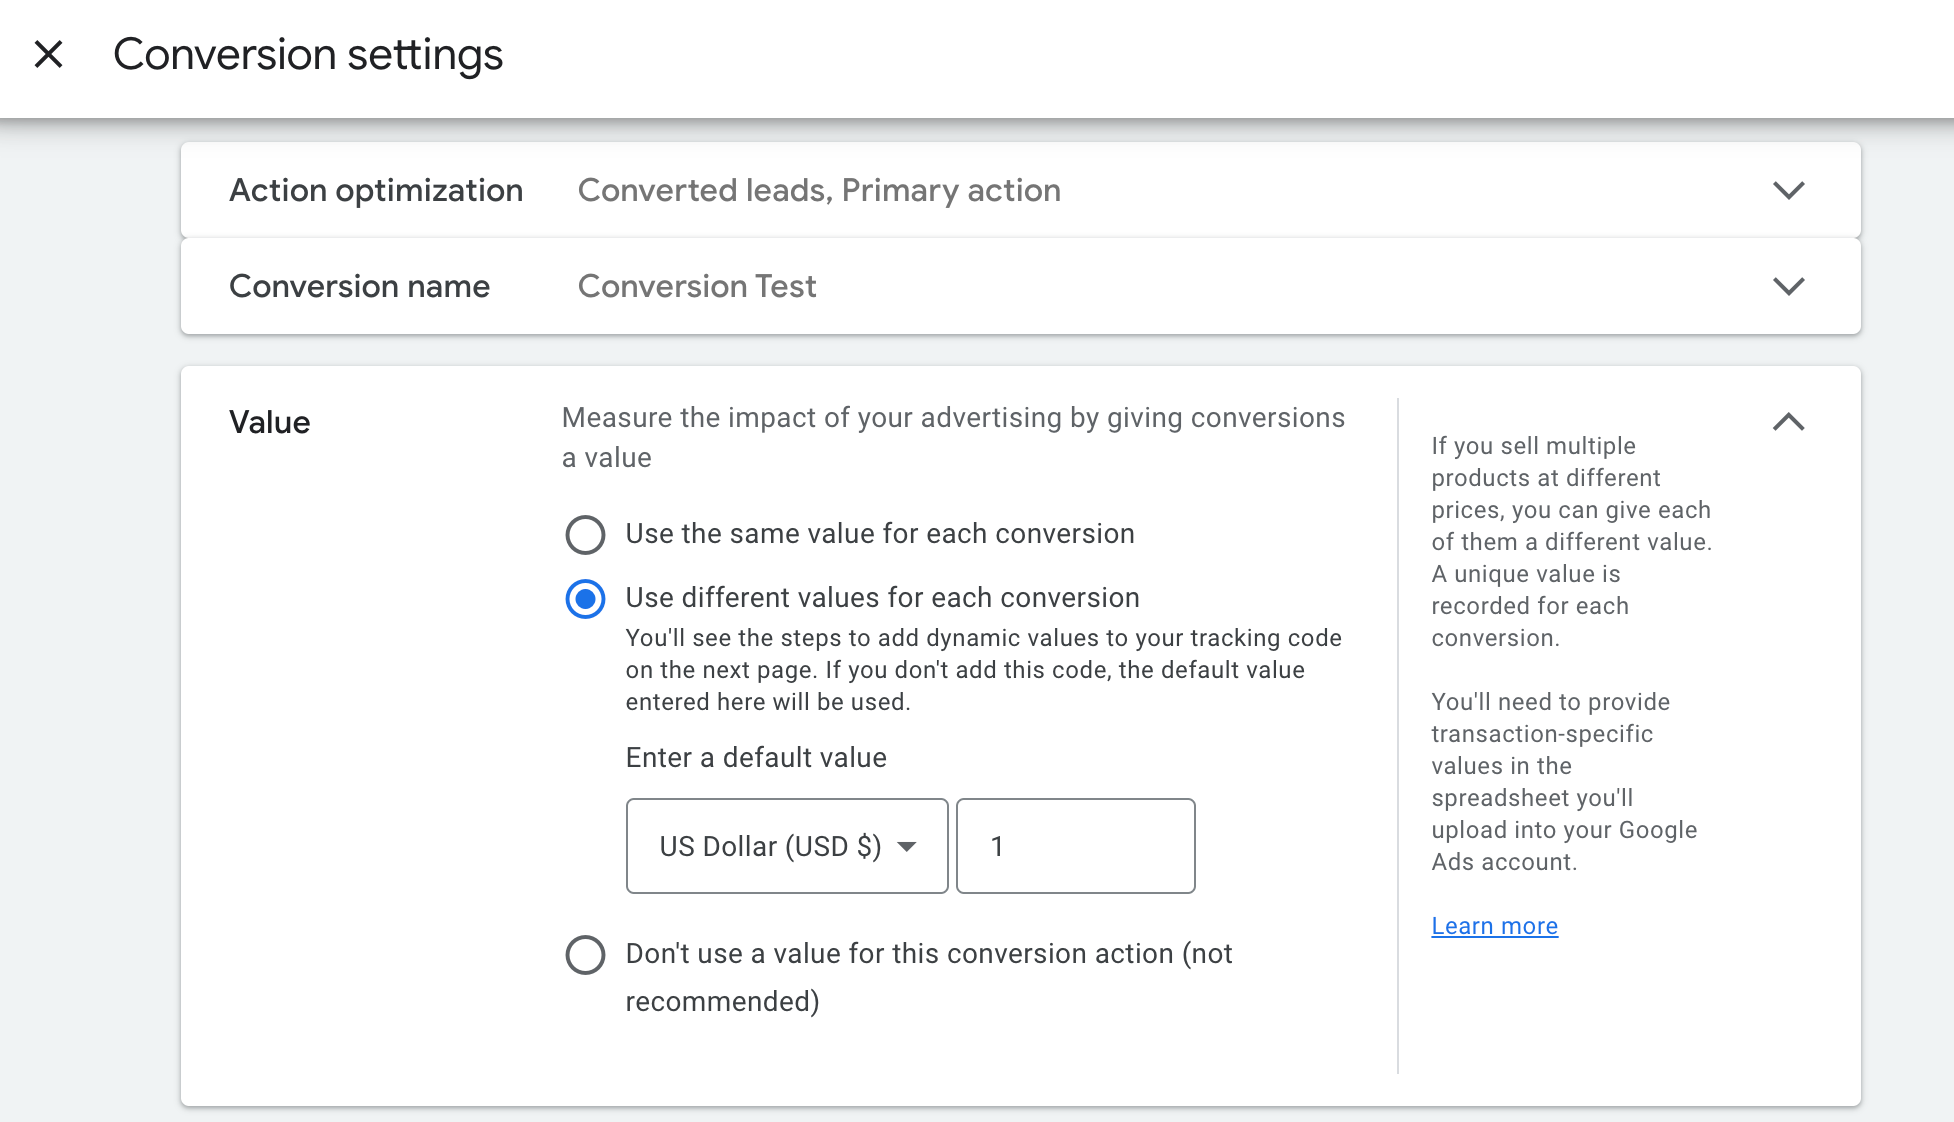
For the count, choose Every. We recommend it.
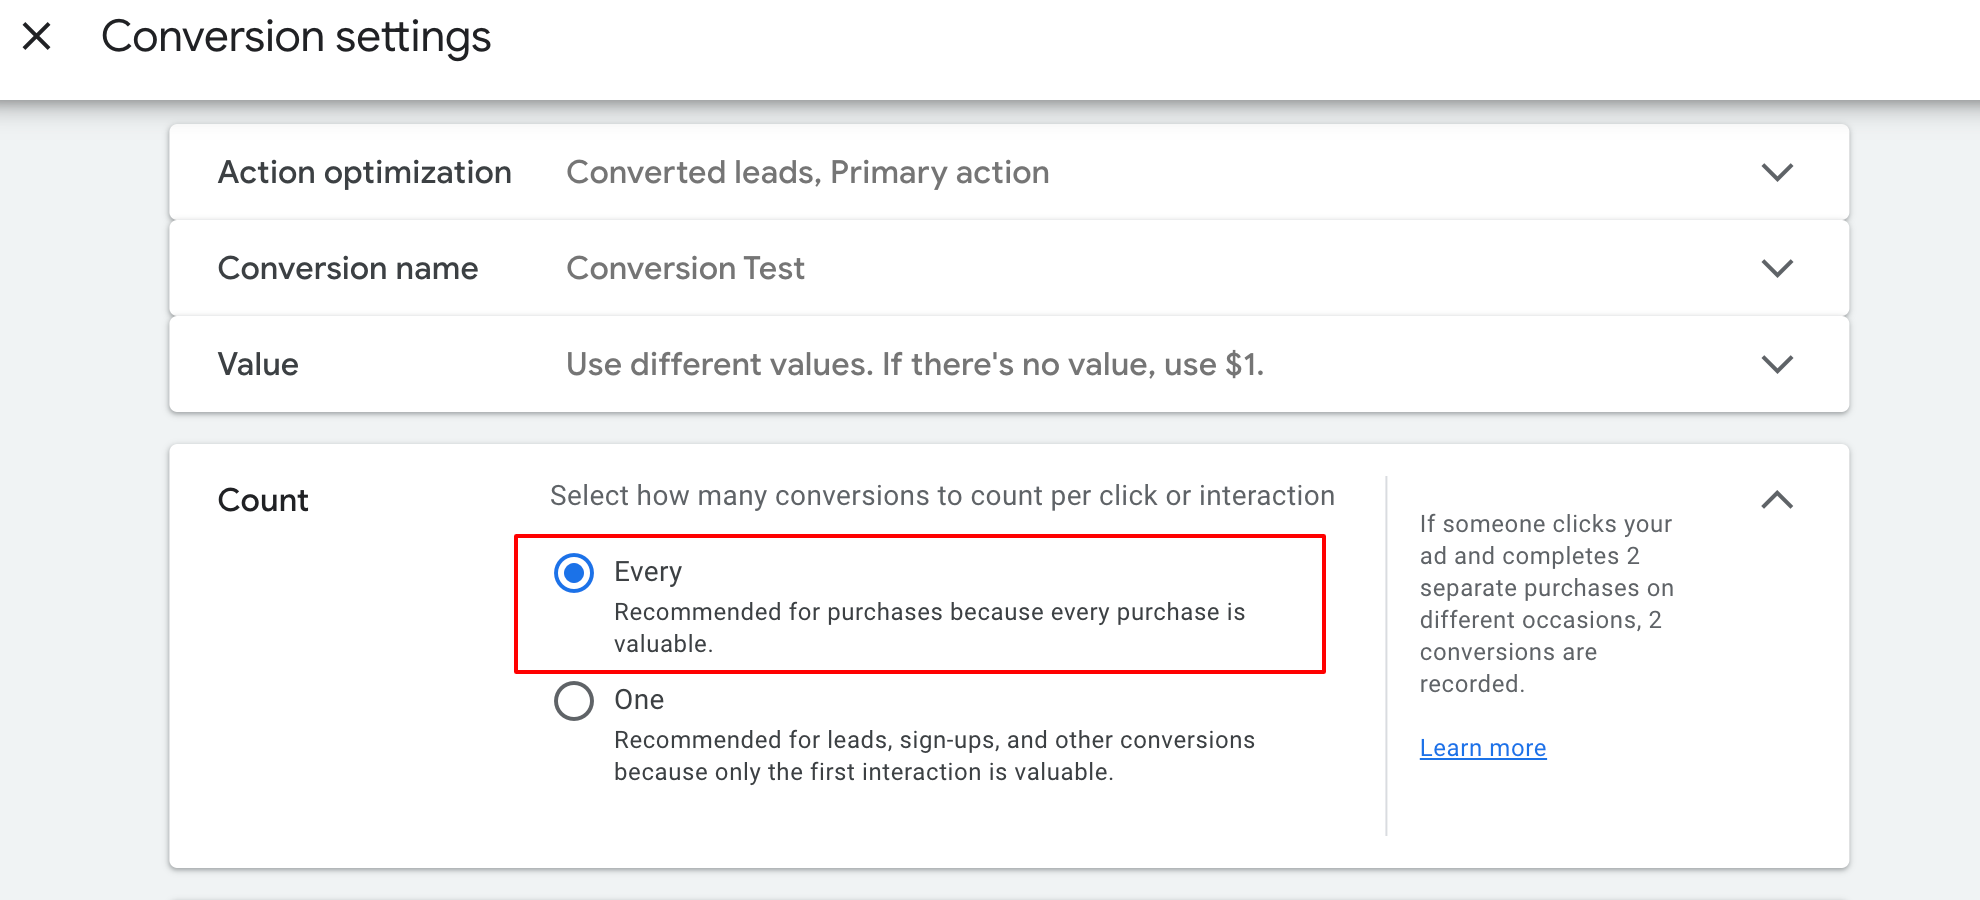
The conversion window is how long after someone clicks your ad that Google still counts the result. Attribution is how Google shares out the credit when someone clicks more than one ad before they enquire.
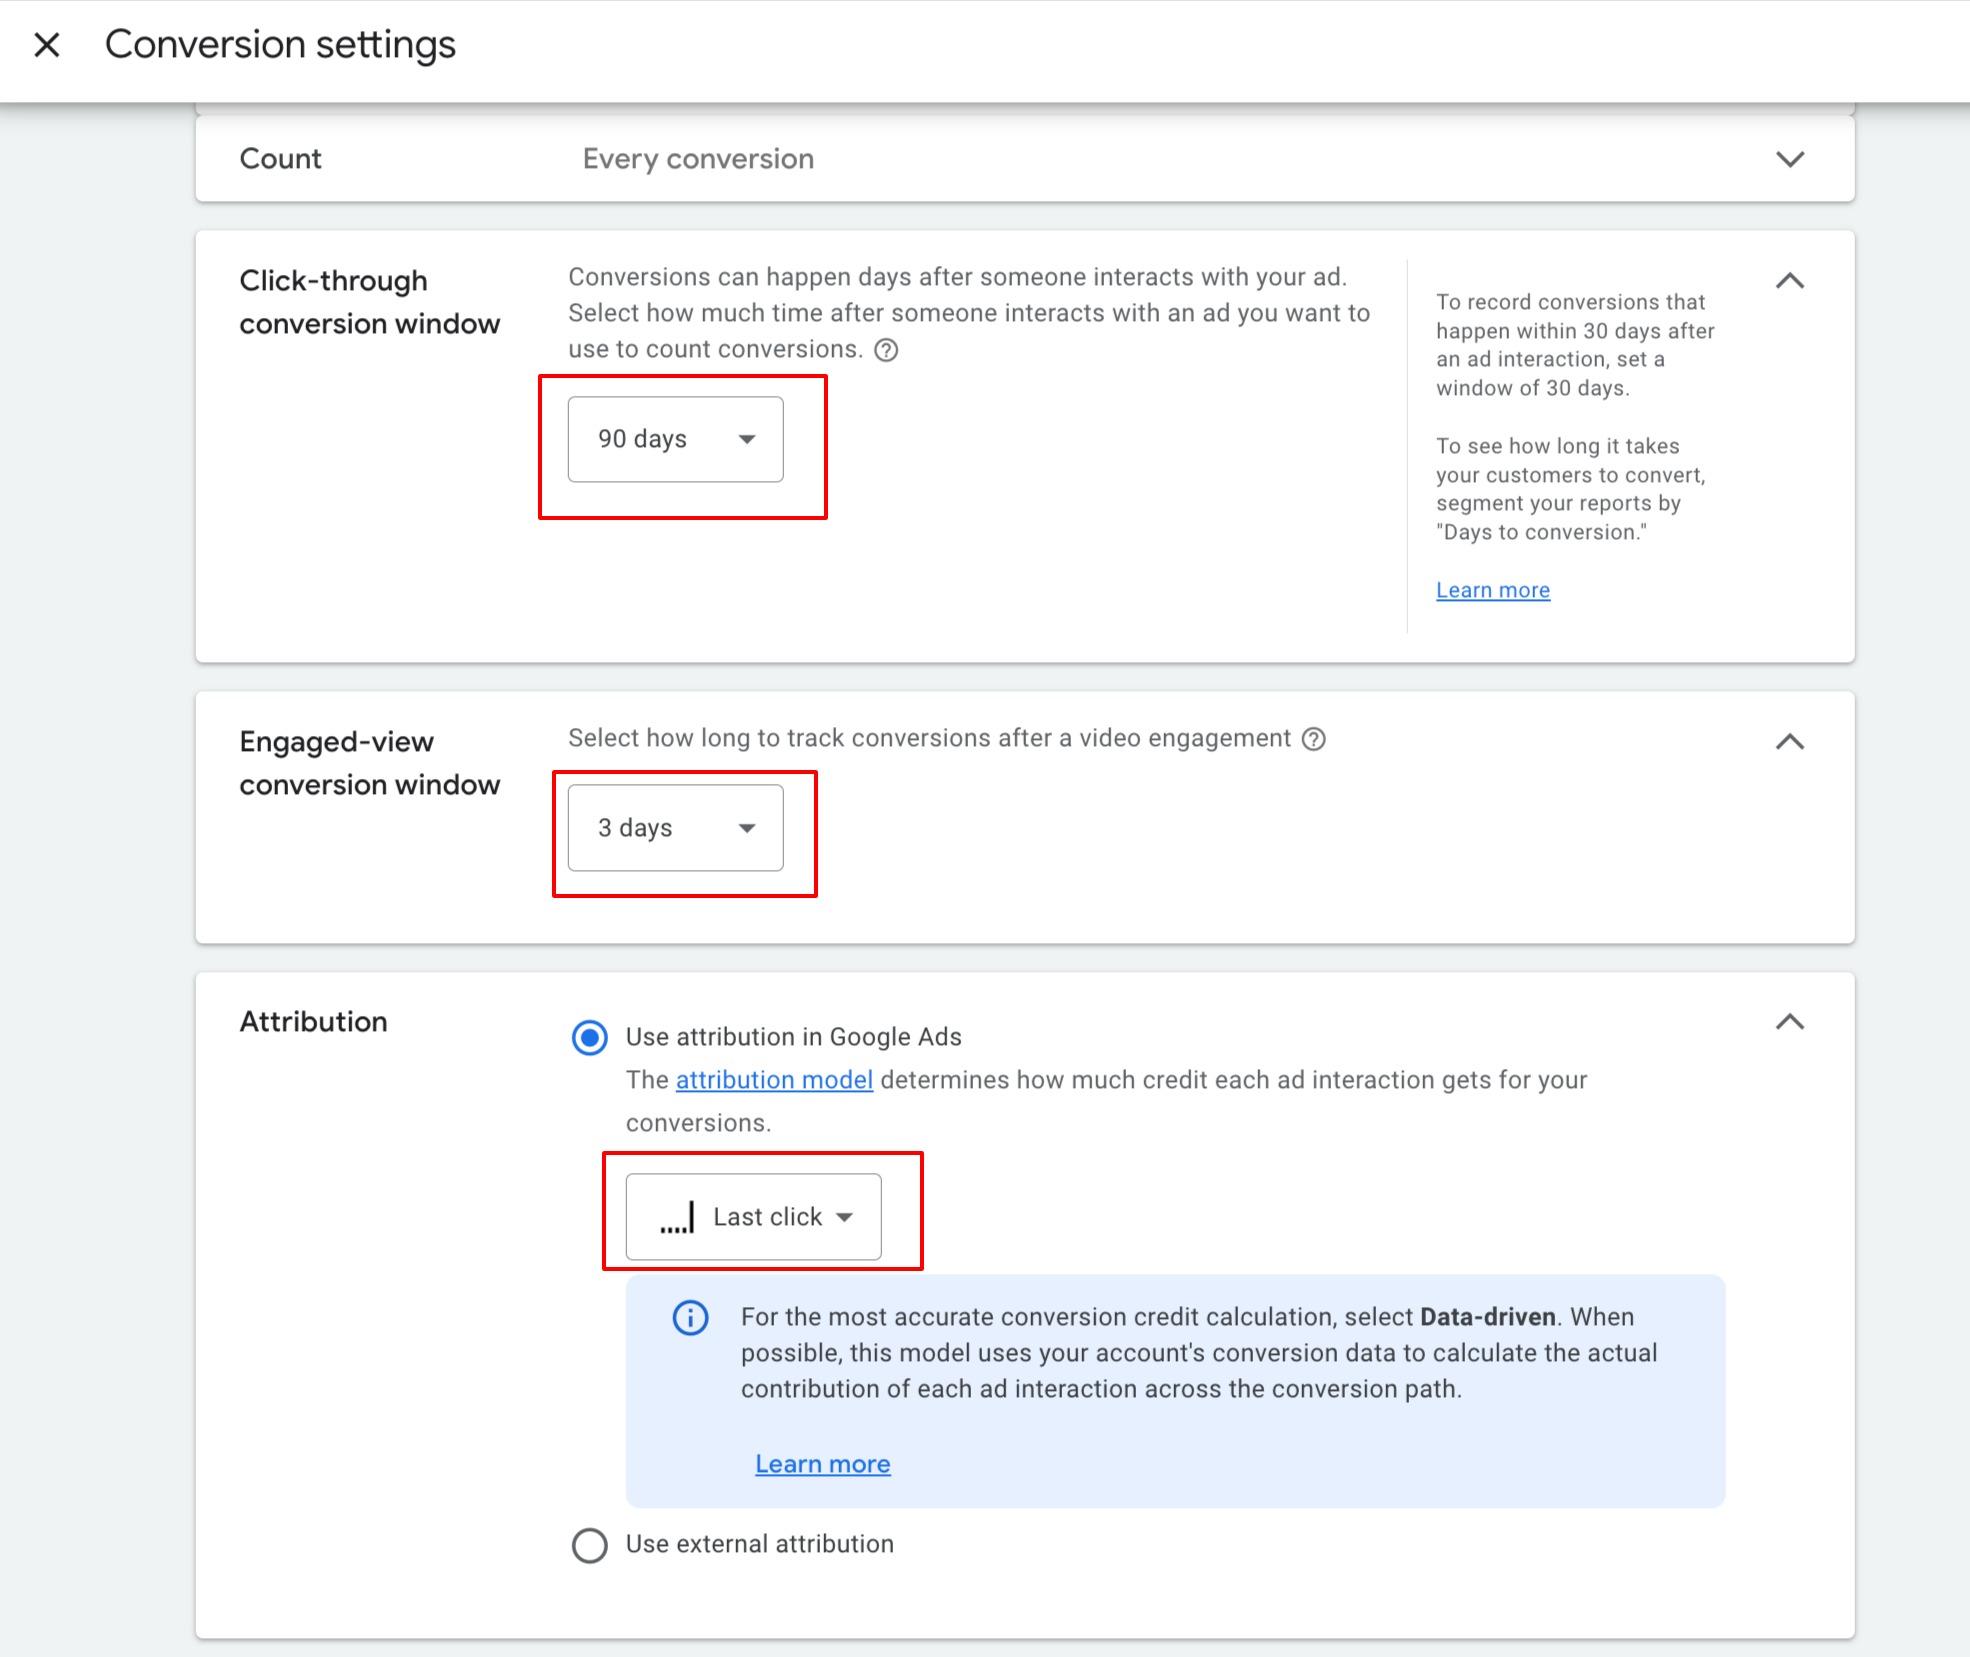
Set the click-through conversion window to 90 days.
Set the engaged-view conversion window to 3 days, which is what Google recommends.
Set the Attribution model to Data Driven (our pick) or Last Click.
Click Done to save these settings.
Click Save and continue, then click Finish. Google Ads is done.
This is the bit that actually sends results back to Google. You can build a workflow for any of these:
Form submissions
Order purchases
Survey submissions
Calls to a number pool
Chat widget conversations

Give it a few minutes. When a contact arrives with a UTM source and a gclid, wbraid or gbraid, the list takes about 5 minutes to fill in the workflow trigger and in Google Ads conversions. Those three are click IDs. Google adds one to your ad link when someone clicks, and that is how it matches the lead back to the ad.
Create a new workflow.
Choose the trigger: Form Submission, Order Form Submission or Survey Submission.
Add a filter for the specific form, order form or survey, then save the trigger.
Click the plus icon to add an action. Choose Add to Google Ads and pick your conversion action from the dropdown.
Set the Currency and the Conversion Value.
Click Save, then Publish.
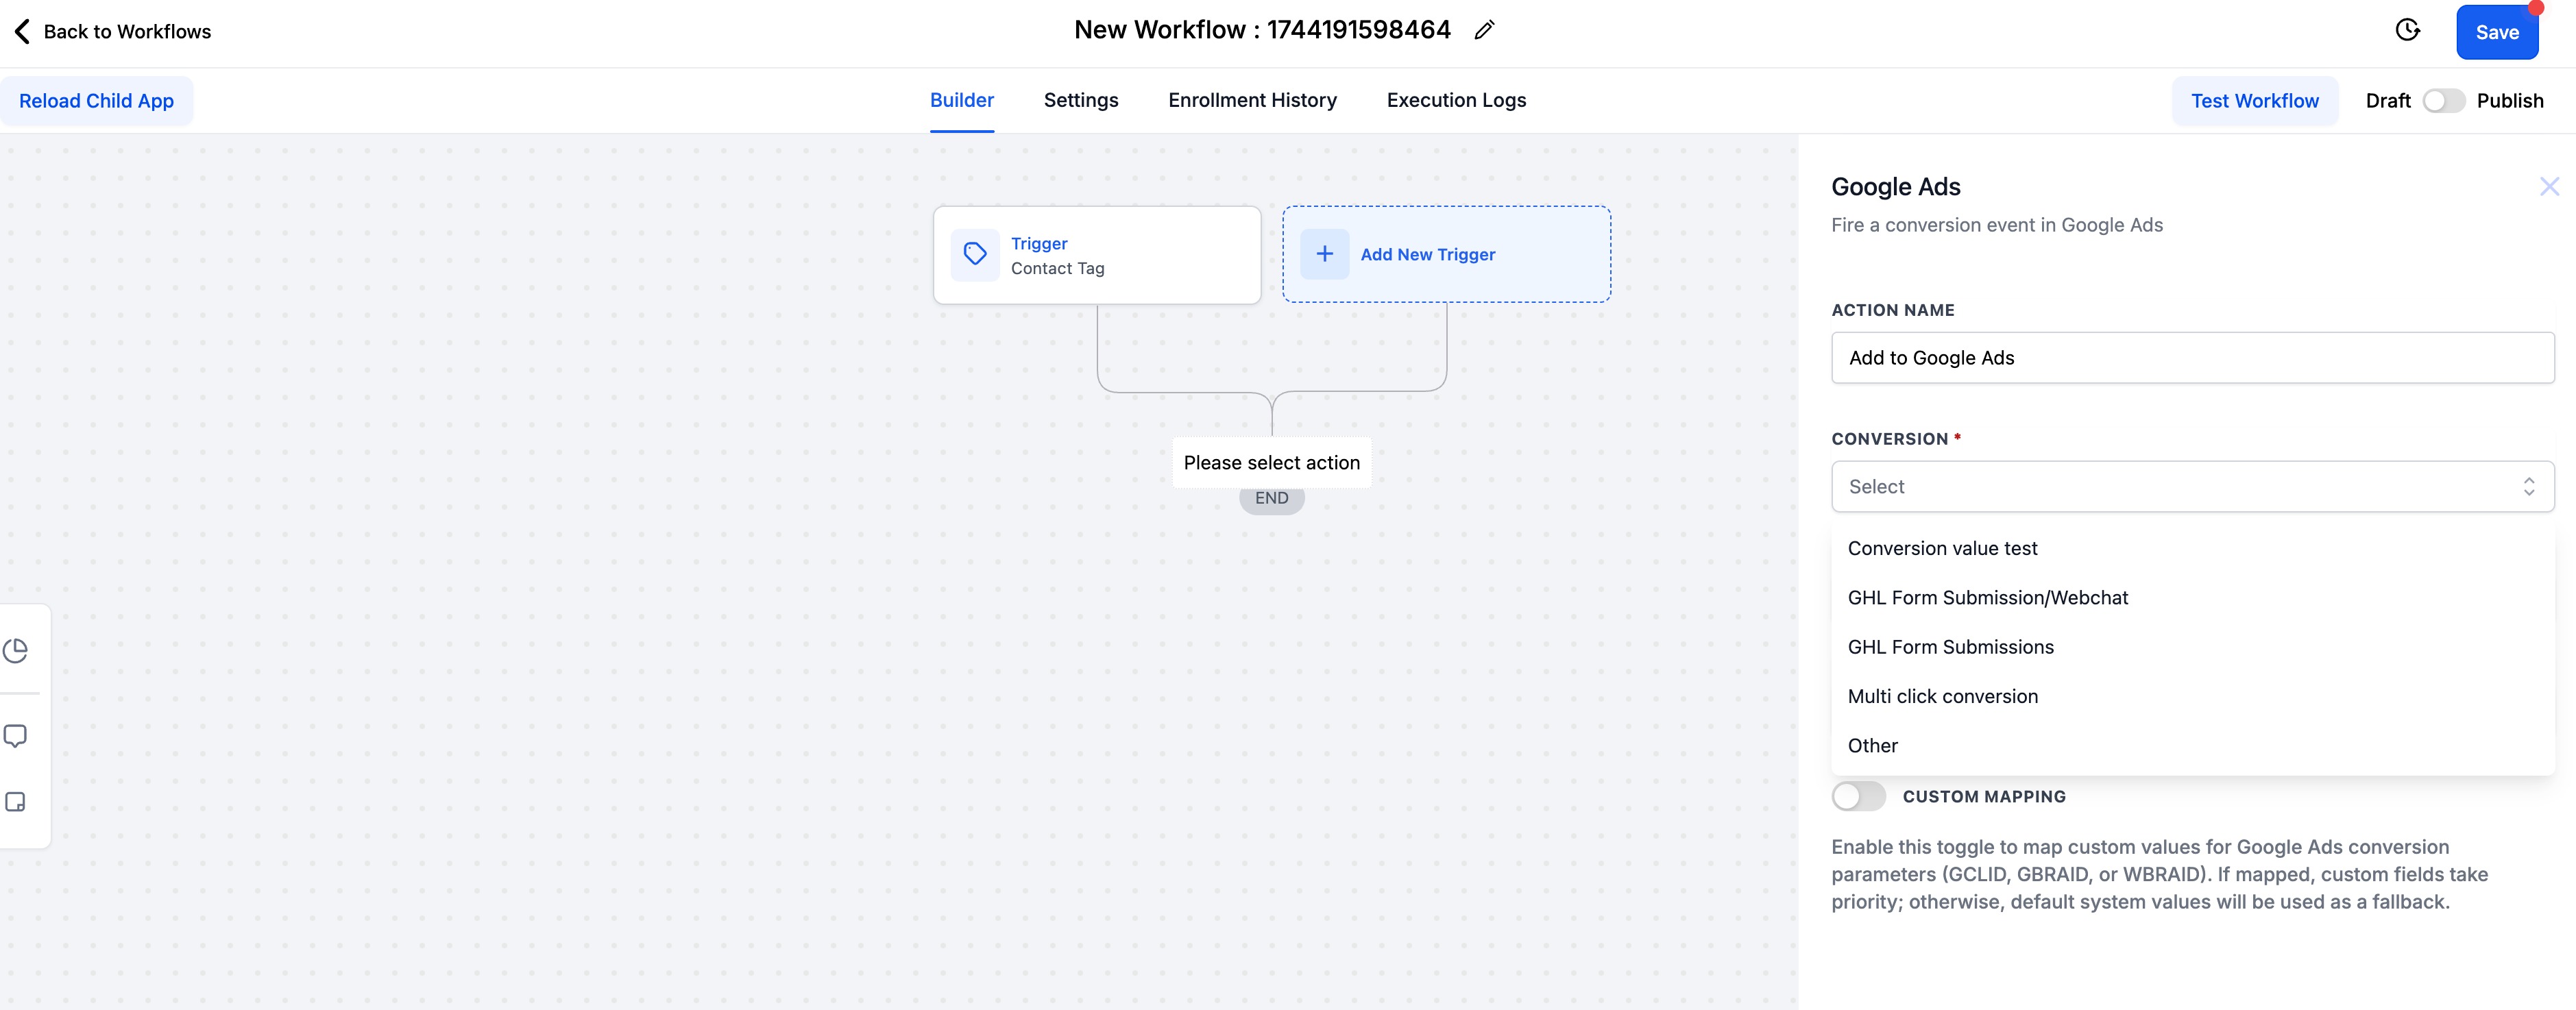
Create a new workflow.
Choose the trigger: Call Status.
Add two filters: set Call Direction to Incoming, and set Pool Number to your pool number.
Add the pool number script to your funnel or website, in the header settings. Don't skip this one. Without the script, the calls can't be tied back to your ads.
Click the plus icon to add an action. Choose Add to Google Adwords and pick your conversion action.
Set the Currency and the Conversion Value.
Click Save, then Publish.
Create a new workflow.
Choose the trigger: Customer Replied.
Click the plus icon to add an action. Choose Add to Google Adwords and pick your conversion action.
Set the Currency and the Conversion Value.
Click Save, then Publish.
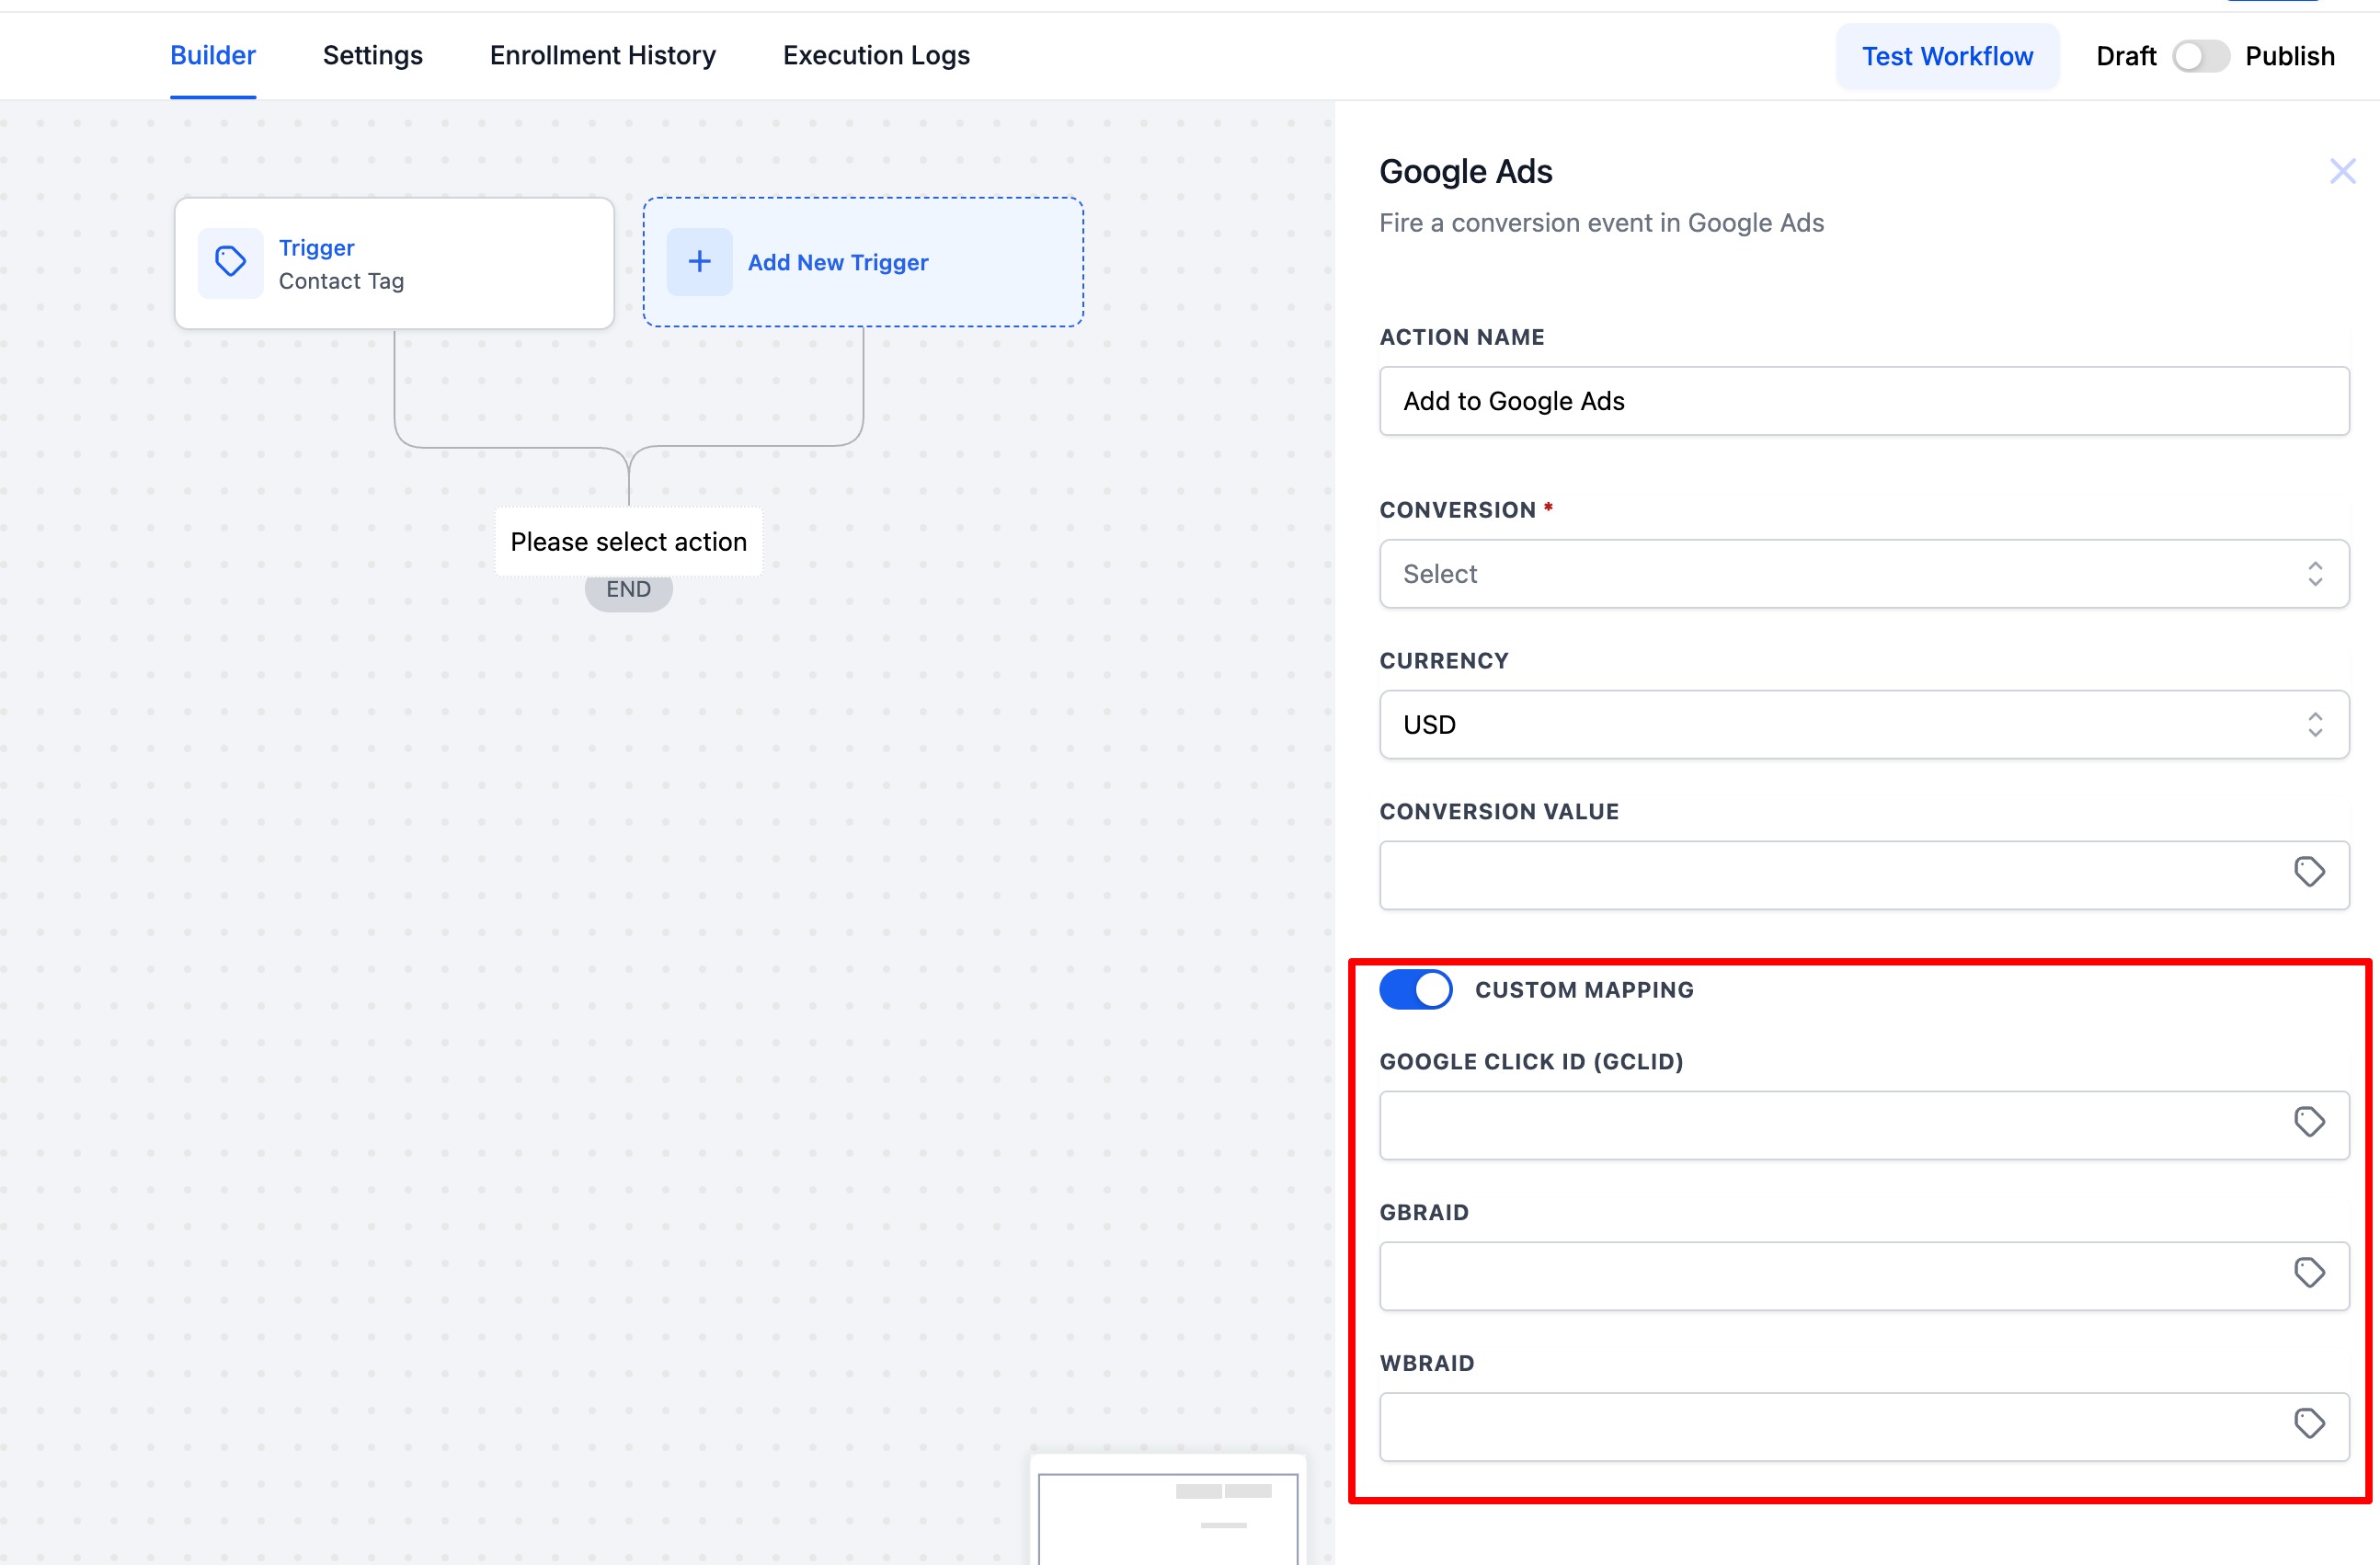
By default, SmartFlow maps the GCLID, GBRAID and WBRAID click IDs for you. Most people never need to touch this.
If you do want control, there is a custom mapping toggle. It is off by default. Switch it on and you can enter your own values for each ID. Your values win over the defaults. Leave a field empty and SmartFlow falls back to its own.
How do I know it's working? You can't fire a test event. Instead, open the workflow action and check its History tab. You should see a run for the Google Ads action.
Where do I see my conversions? Give it about 5 minutes to appear in the trigger, the workflow and Google Ads conversions. Check the workflow history within a 15-minute window.
Does it work with every trigger? No. Only Form Submission, Order Purchase, Number Pool Calling, Survey Submission and Chat Widget.
Do Part 1 once. Then add the SmartFlow workflow for each way a customer can reach you: form, order, call or chat. Start with the one that brings you the most enquiries and add the rest as you go.
Stuck on any step? Message Boris and he’ll guide you through.