The SmartFlow design panel gives you complete control over your event page's visual appearance. Follow these steps to create a custom look that matches your brand.
Click the Style icon (paintbrush) in the left sidebar to open the design customisation panel where you can modify colours, layout, and typography.
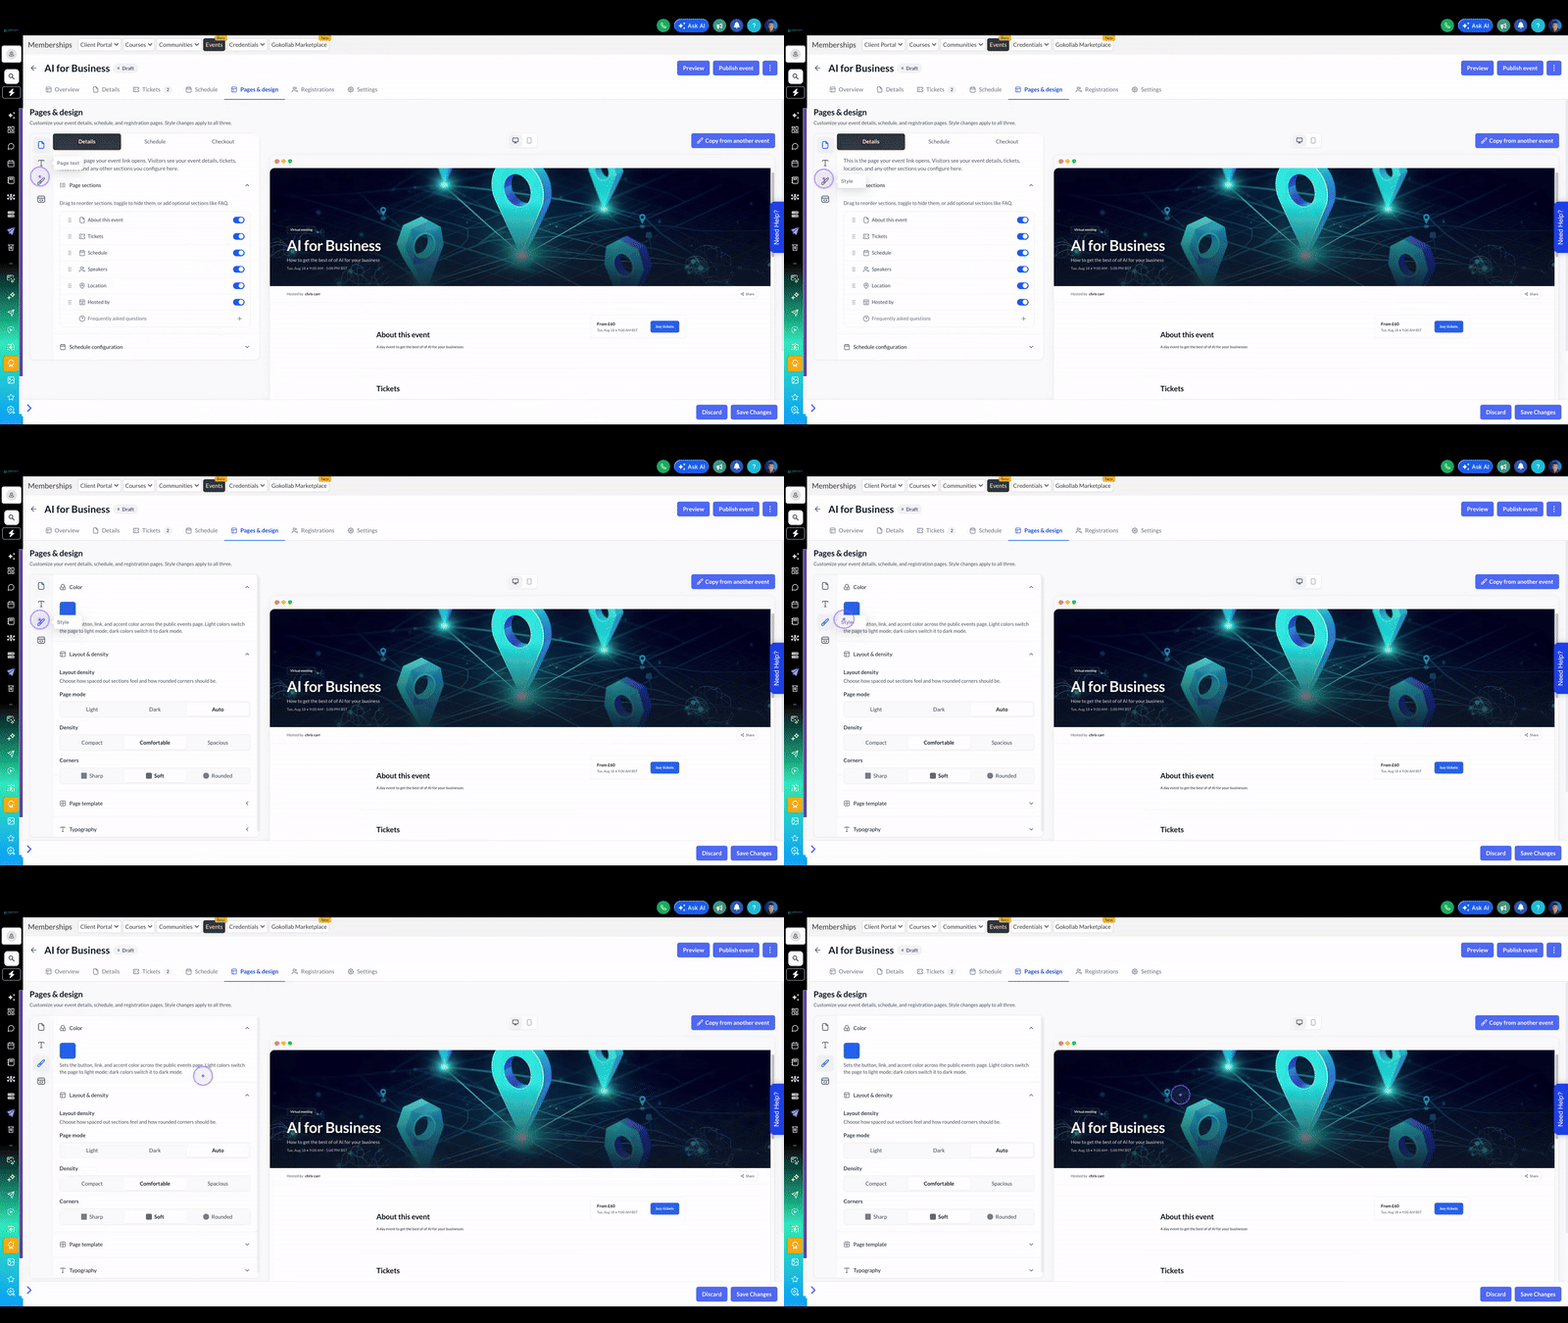
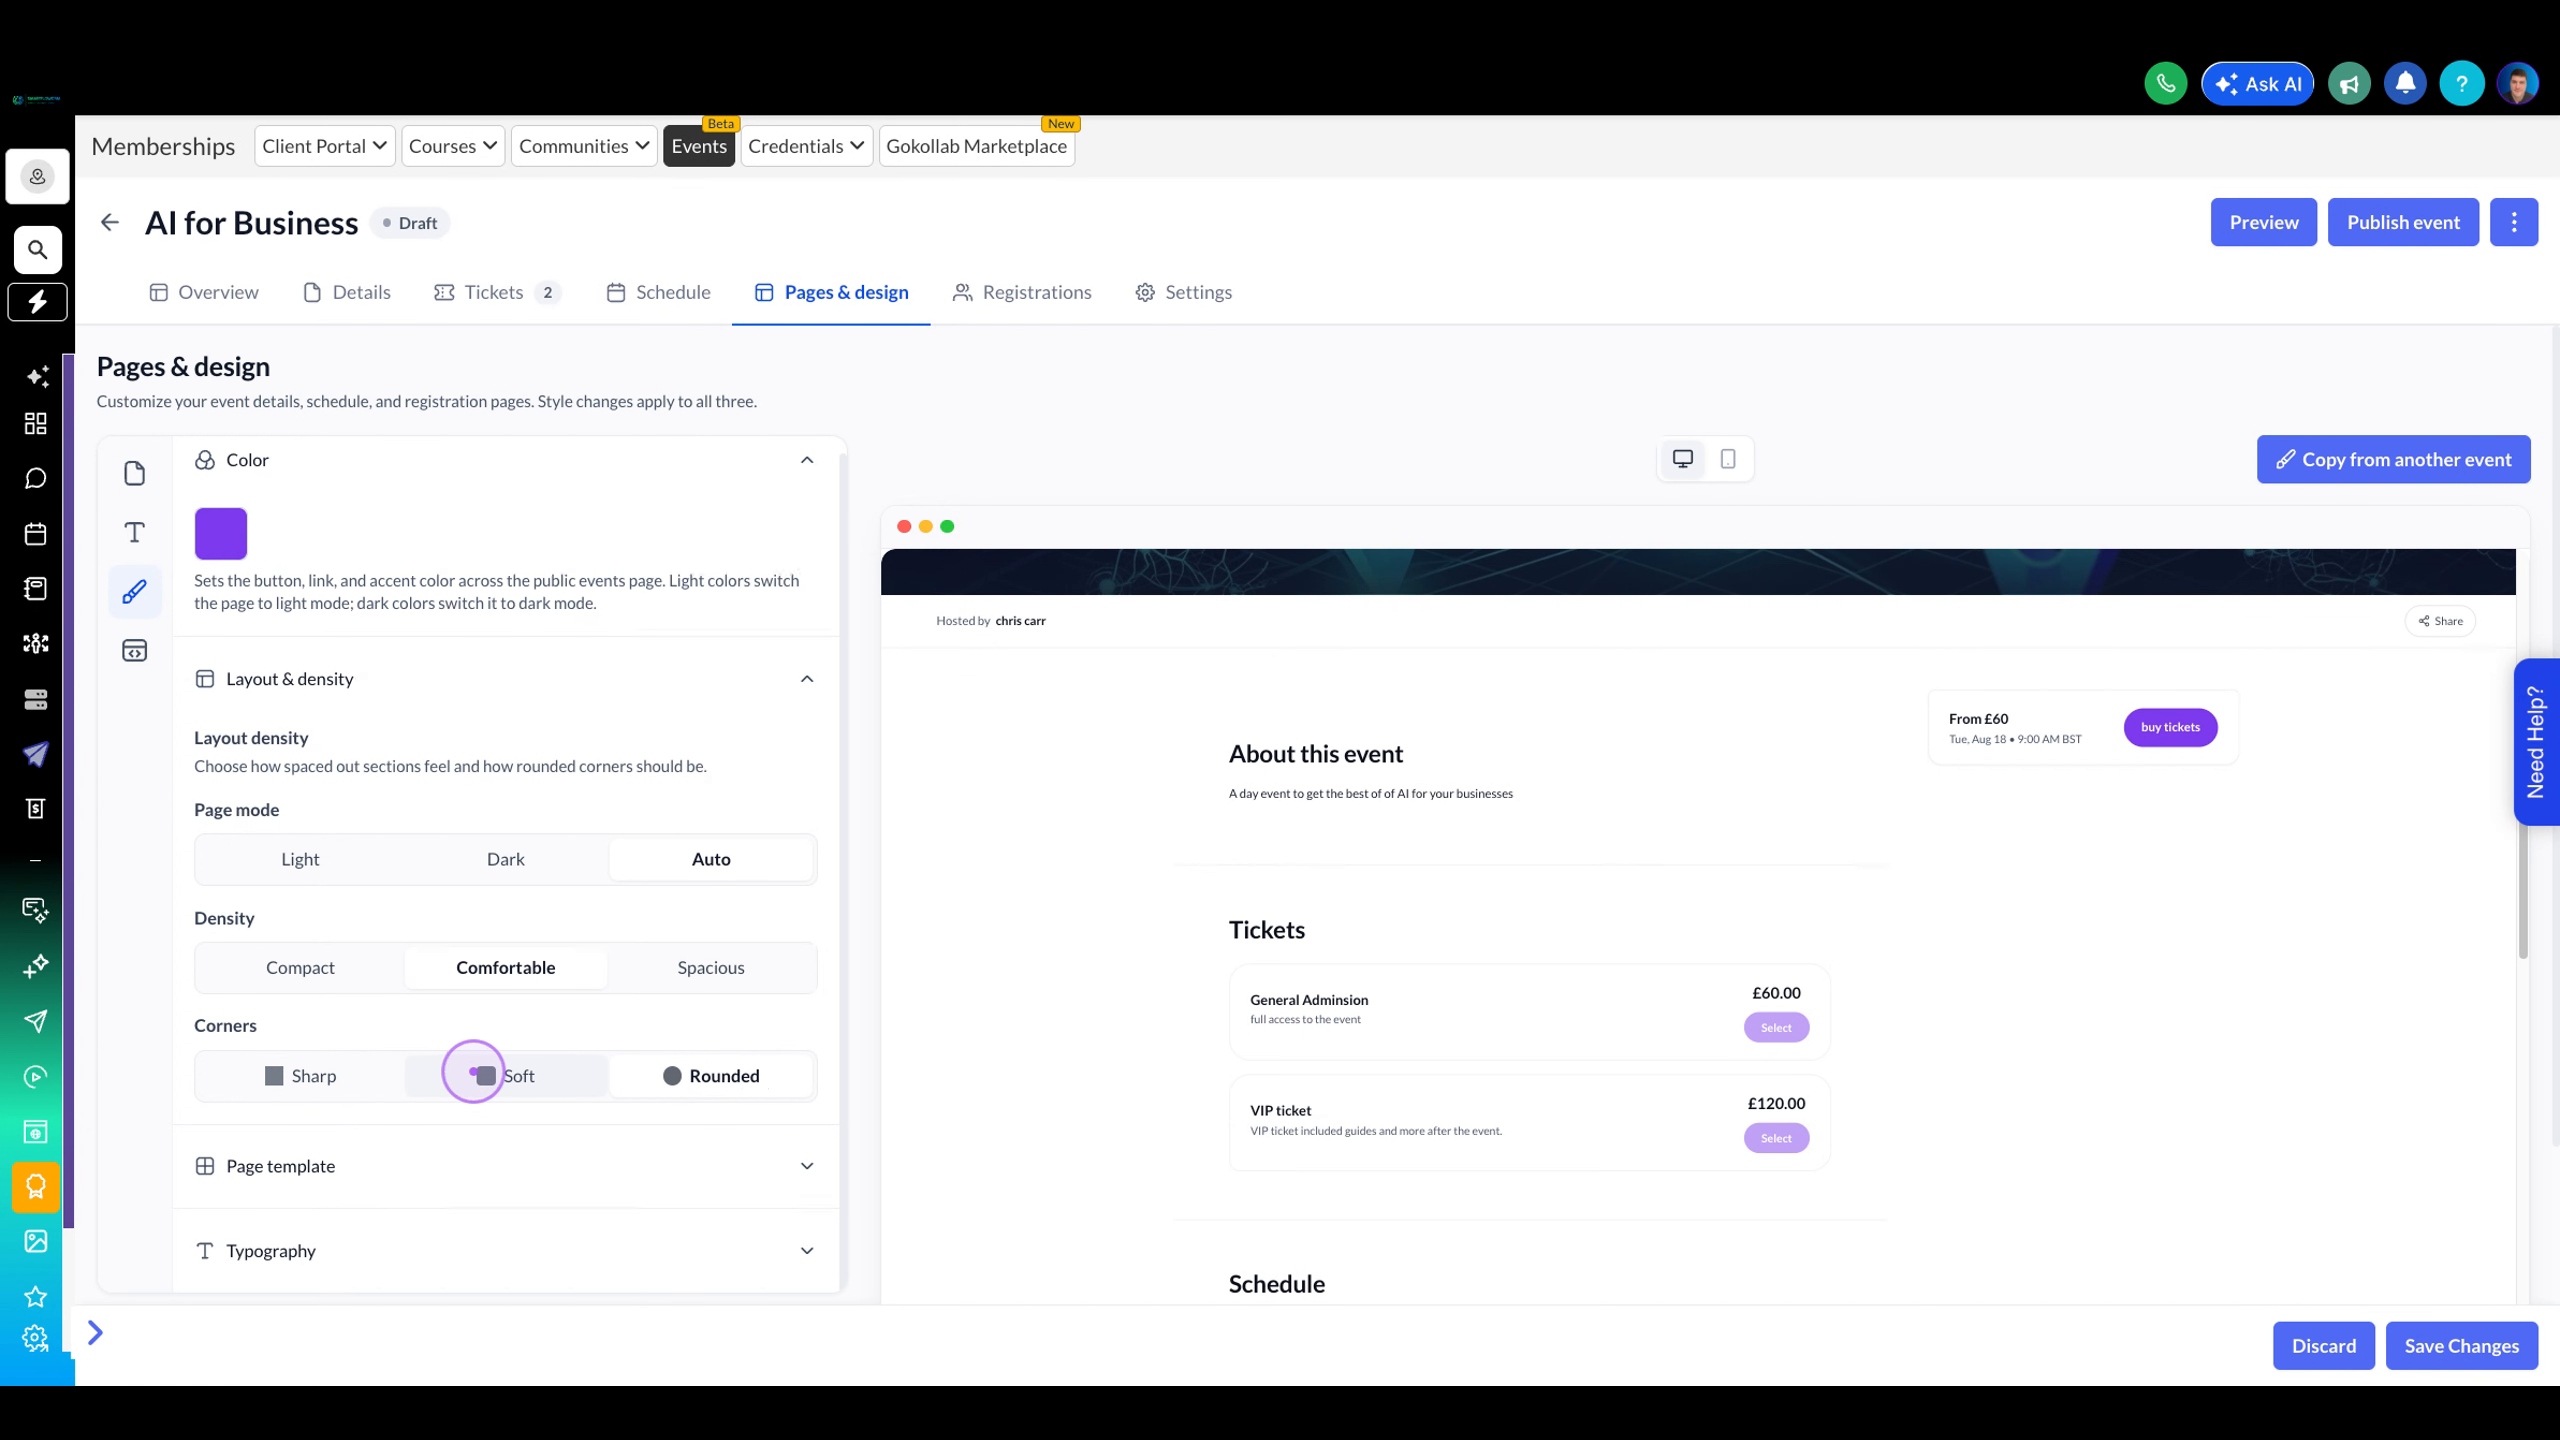
Expand the Colour section and click on the colour swatch to open the colour picker. Select from preset colours or add a custom colour to change buttons, links, and accent elements across your event page.
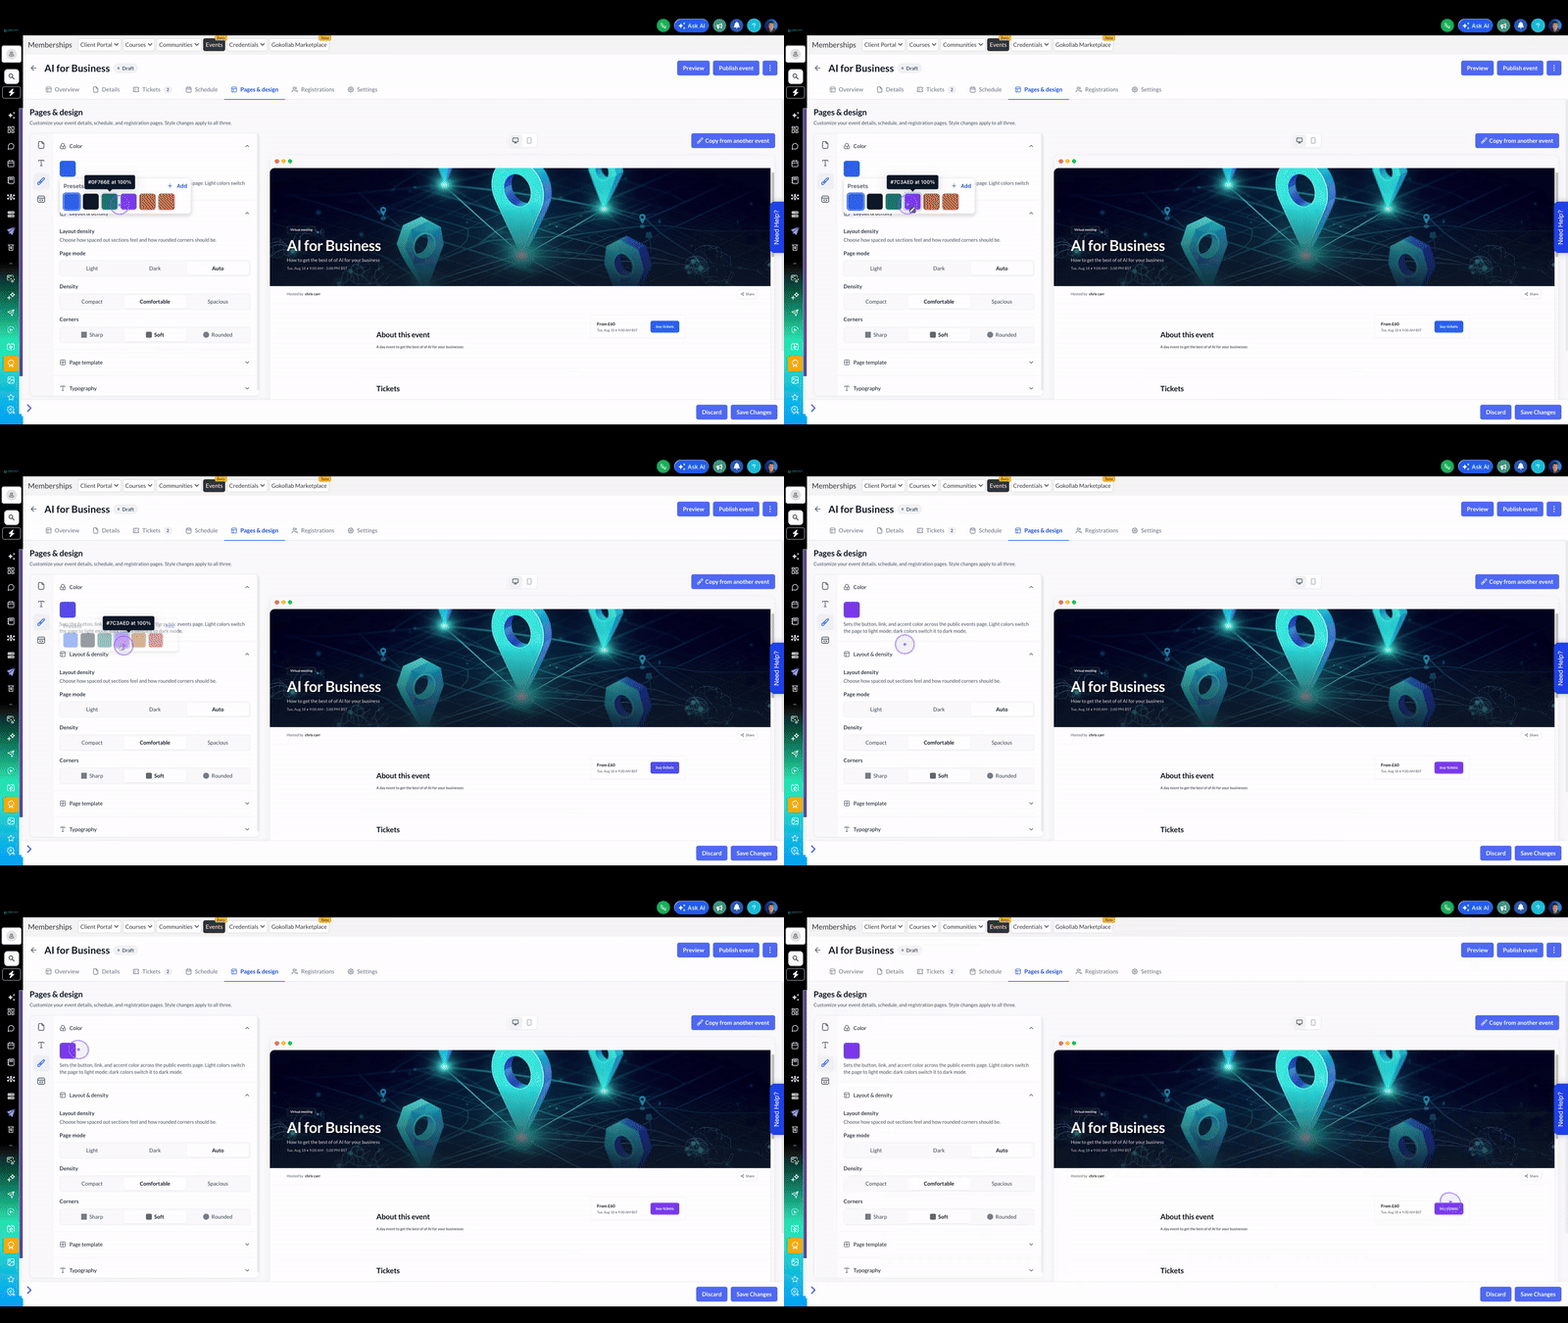
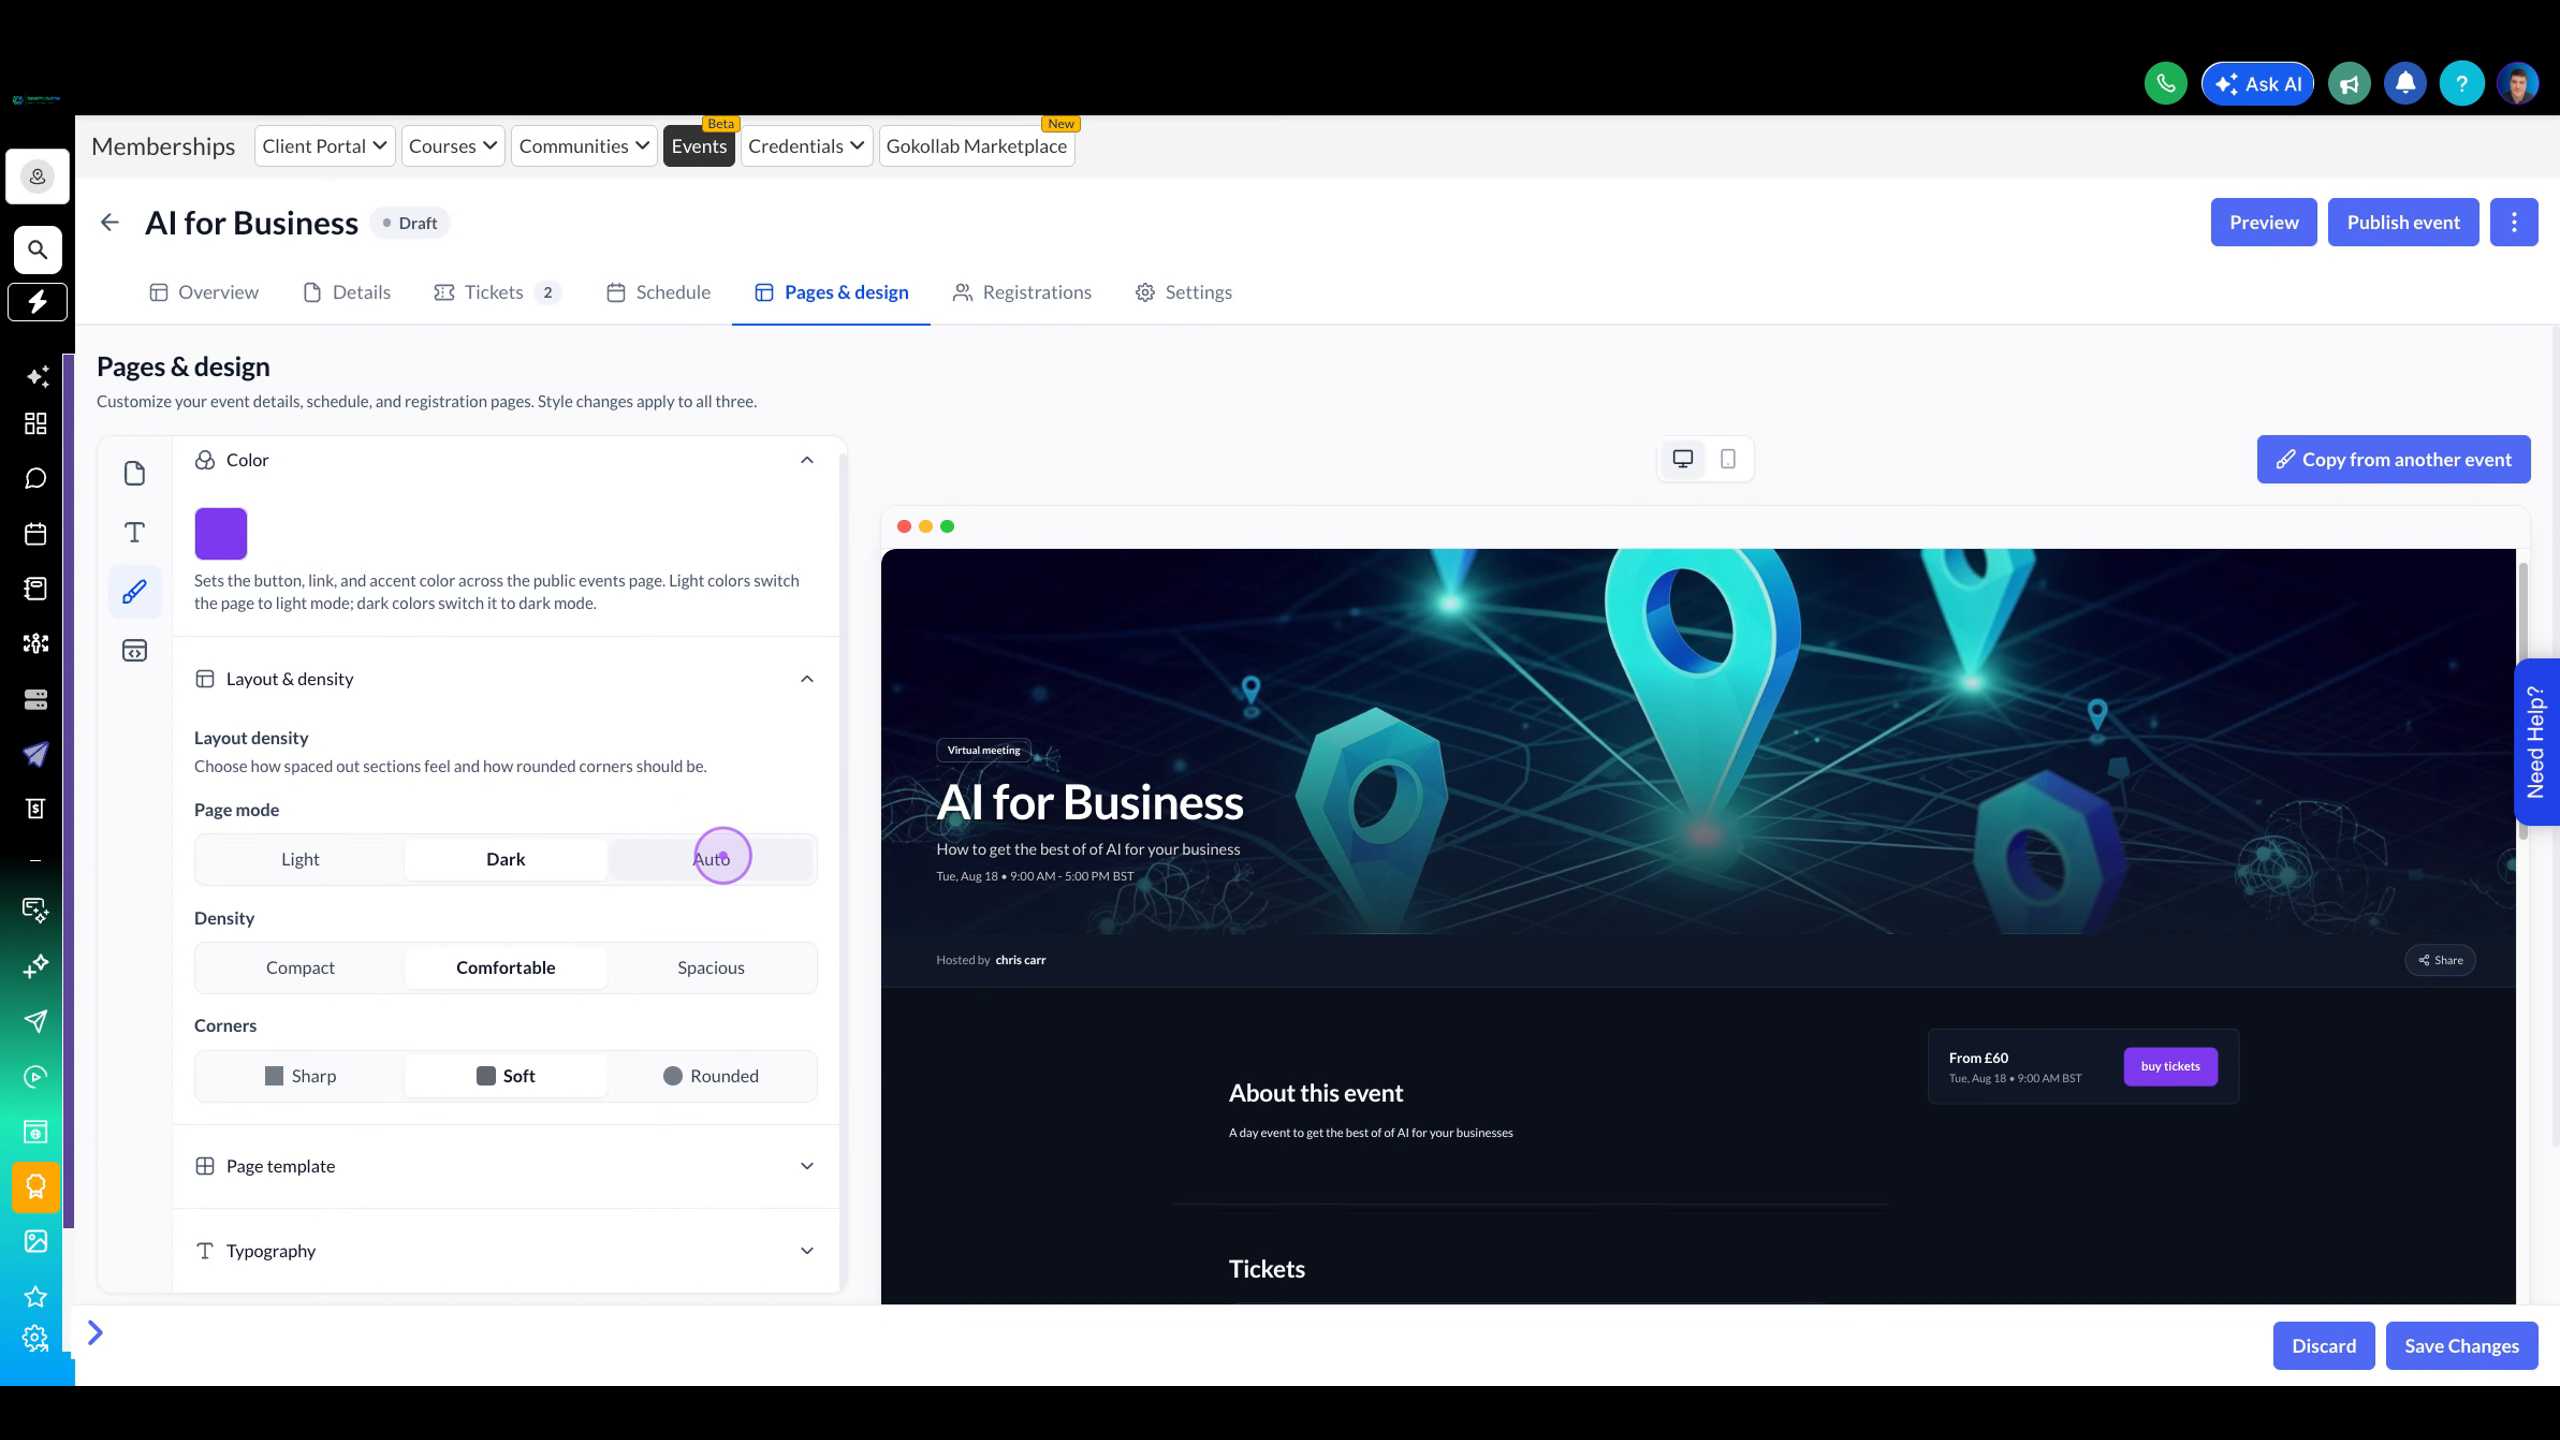
Under Layout & density, choose a Page mode option: Light for light backgrounds with dark text, Dark for dark backgrounds with light text, or Auto to automatically switch based on user system preferences.
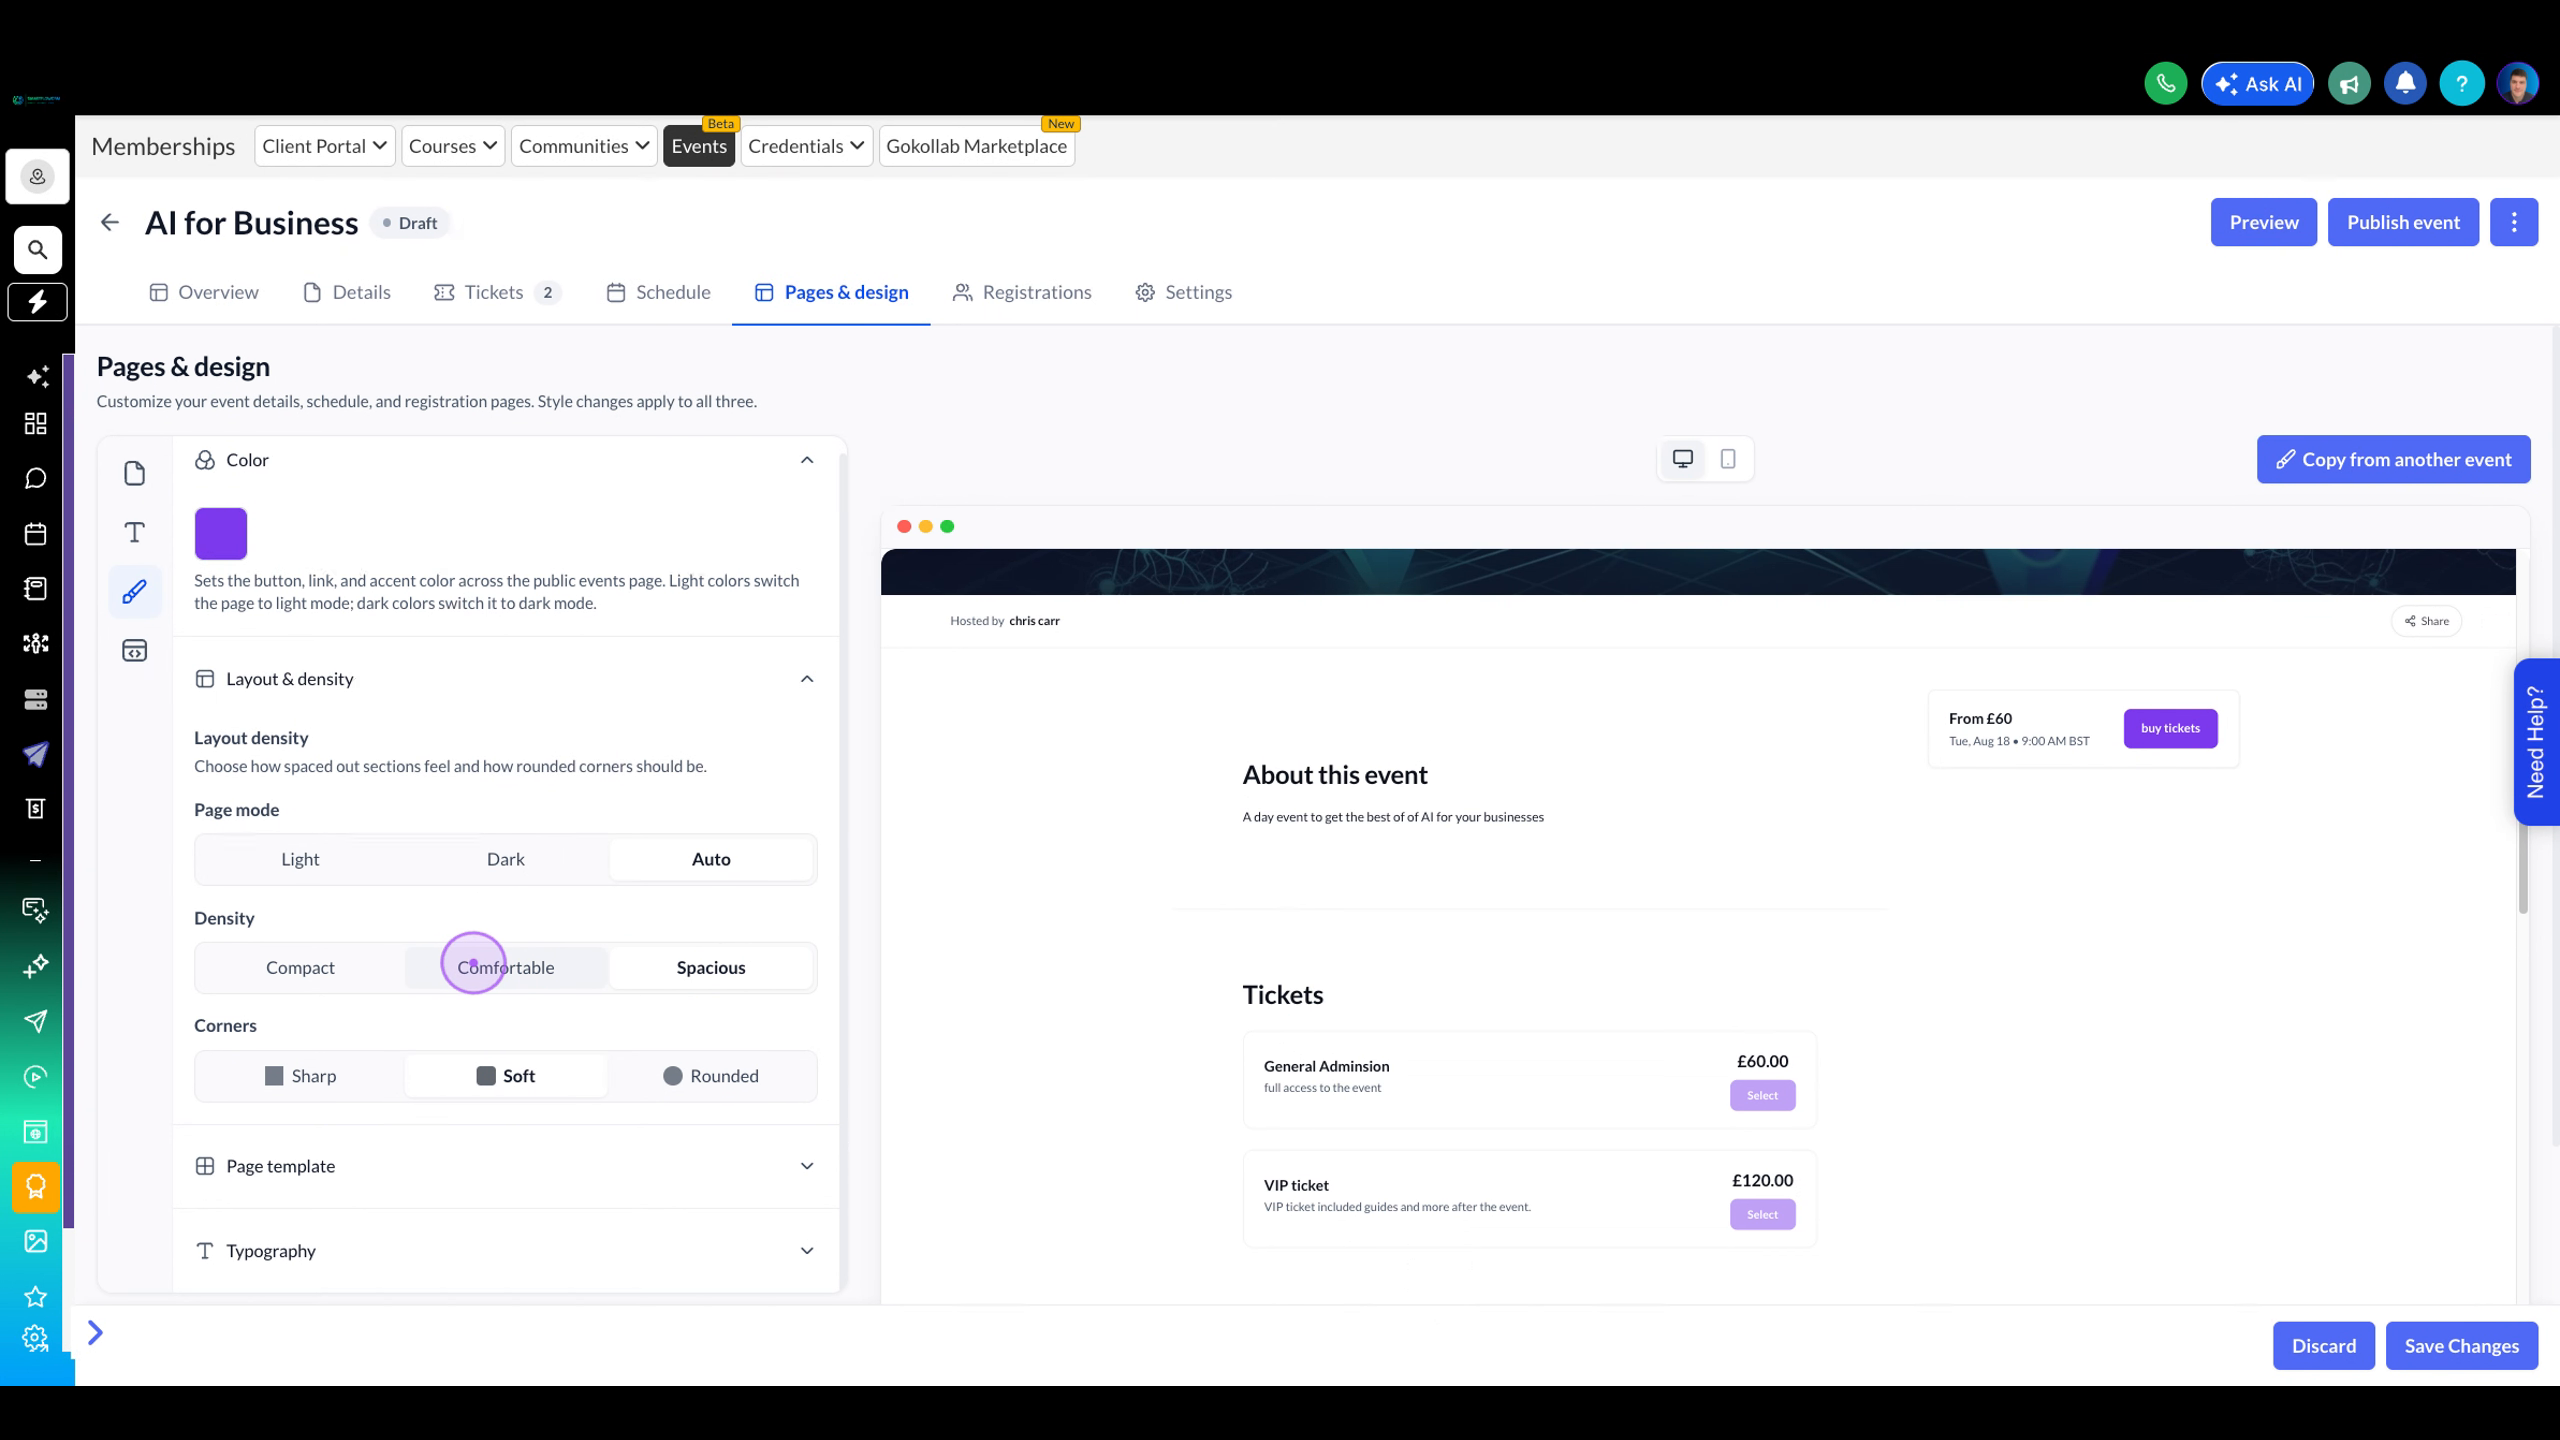
Select a Density option to control spacing between sections: Compact for minimal spacing, Comfortable for balanced spacing, or Spacious for generous spacing between elements.
Choose a Corners style to change the border radius of UI elements: Sharp for square corners, Soft for slightly rounded corners, or Rounded for fully rounded corners.
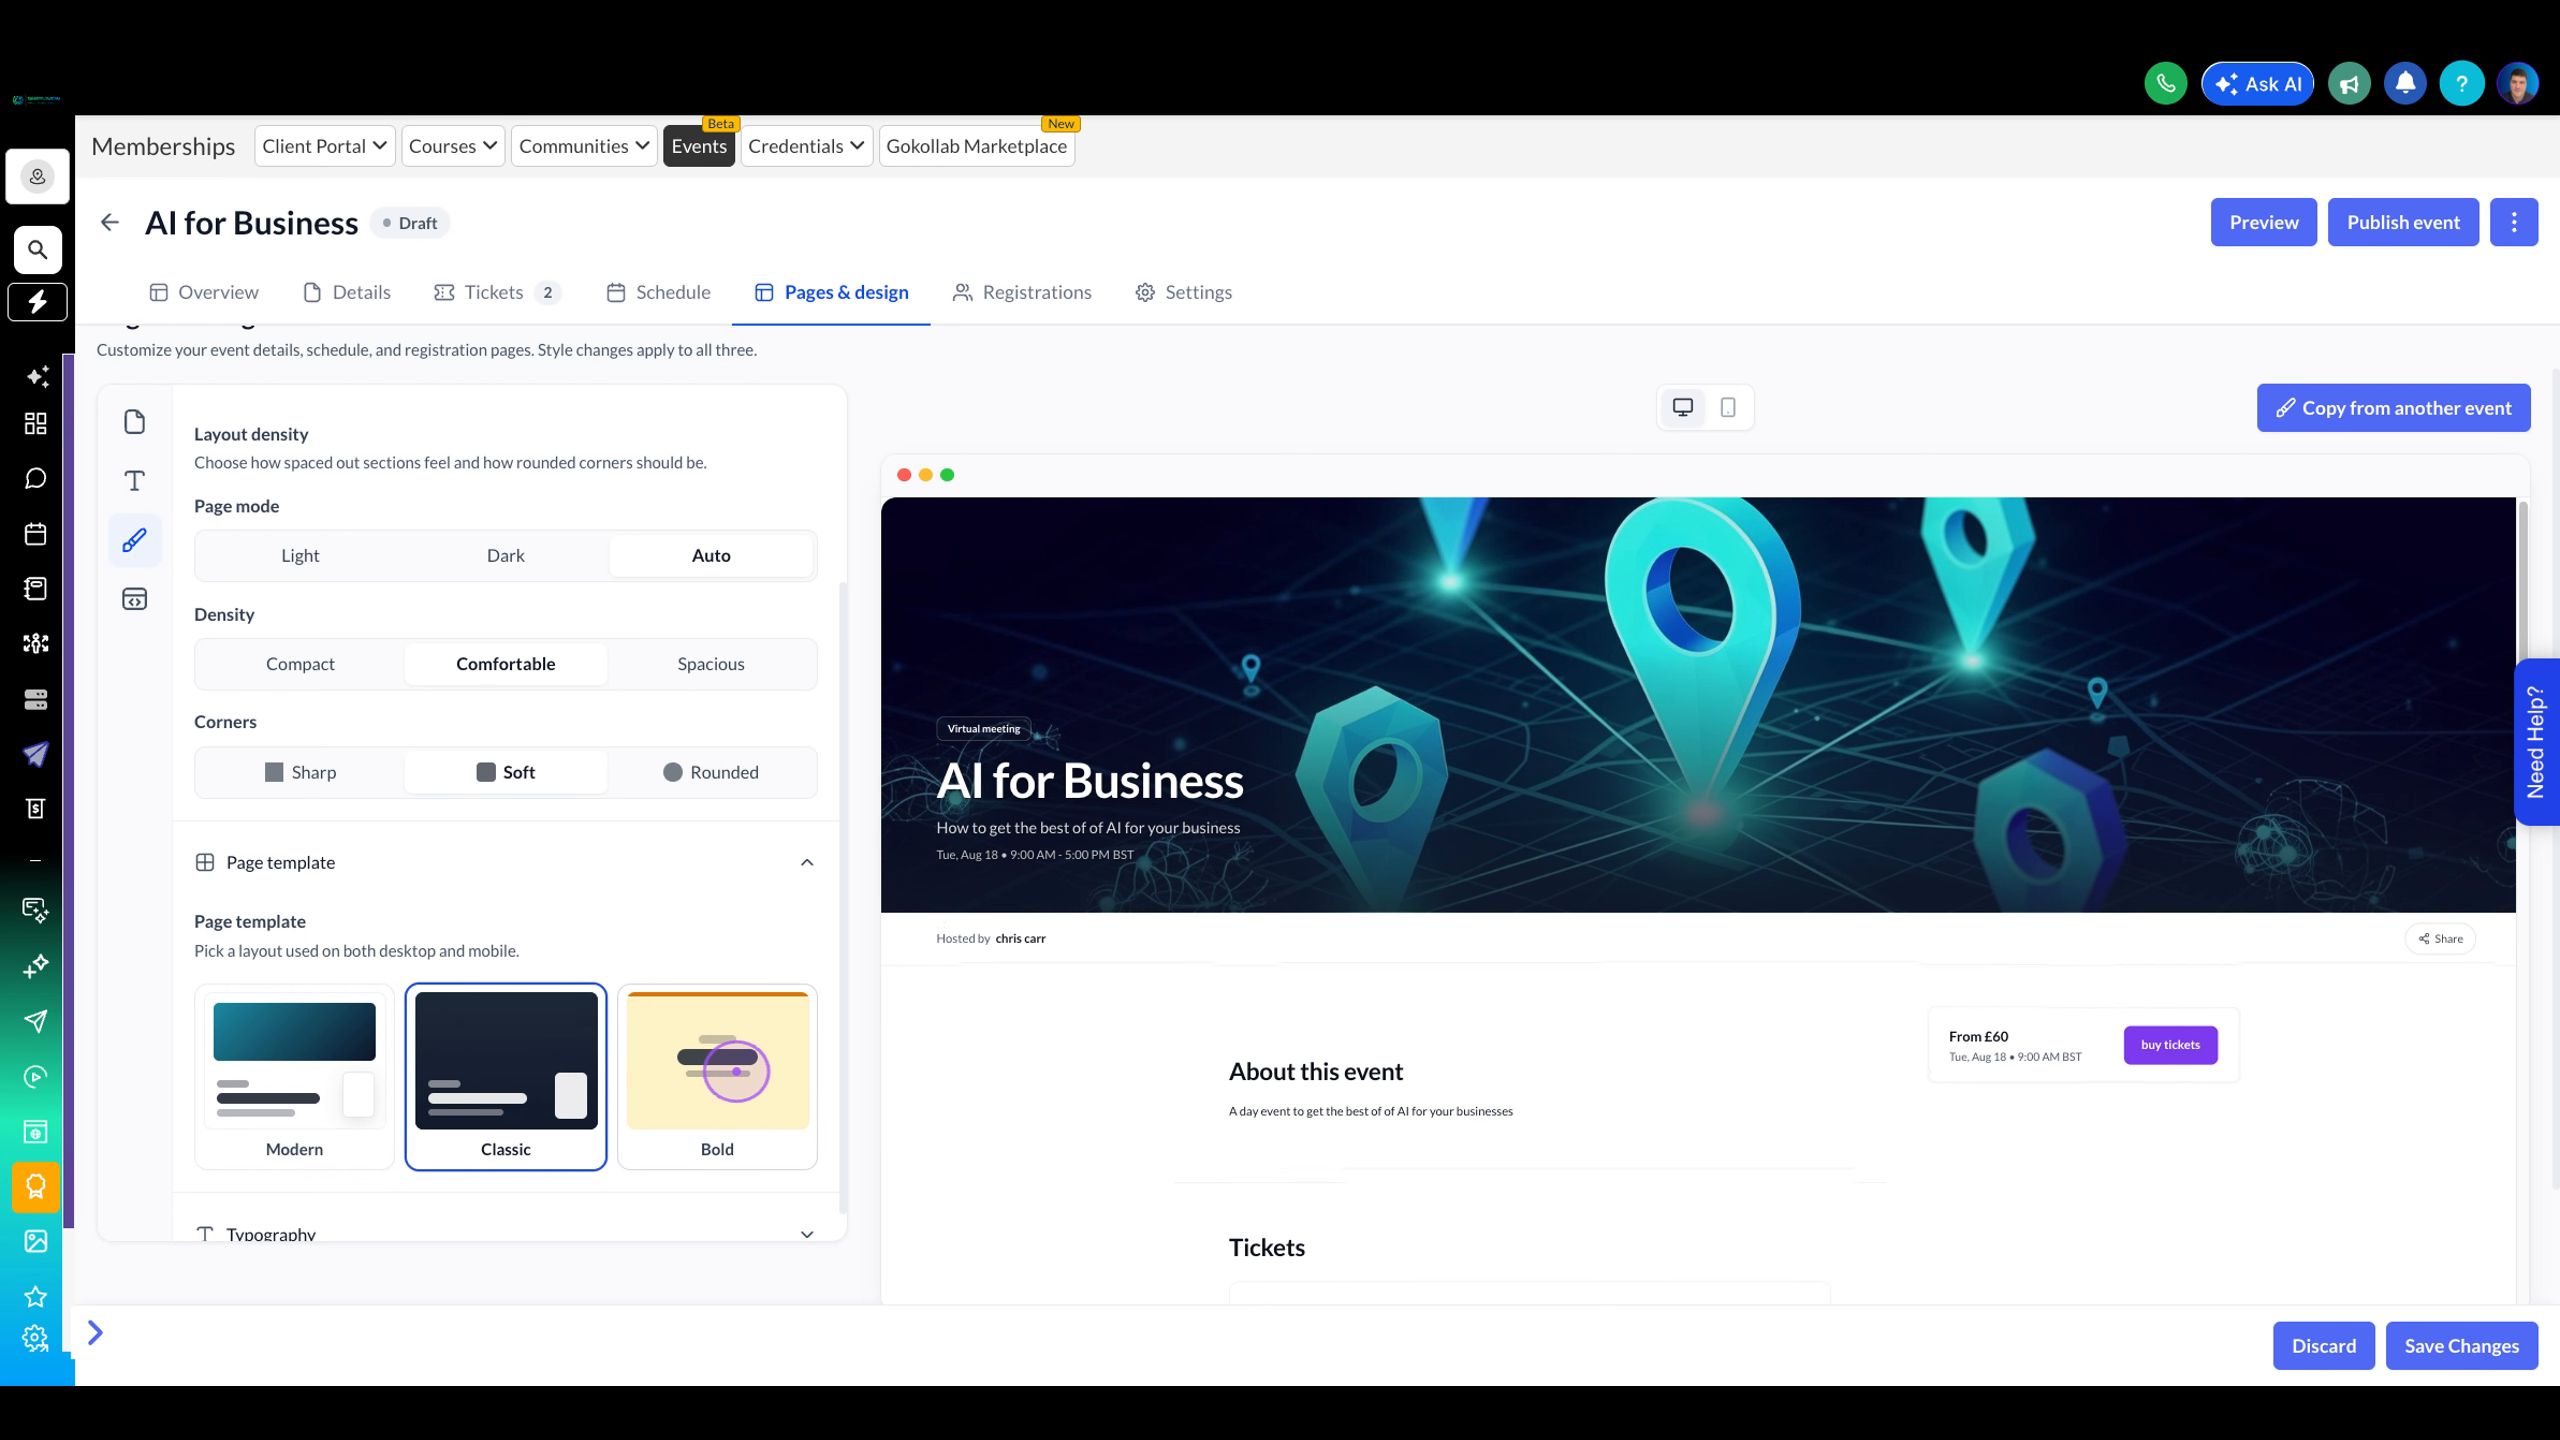
Expand the Page template section and choose from available layouts: Modern for a clean contemporary design, Classic for a traditional layout with sidebar, or Bold for a high-impact full-width design.
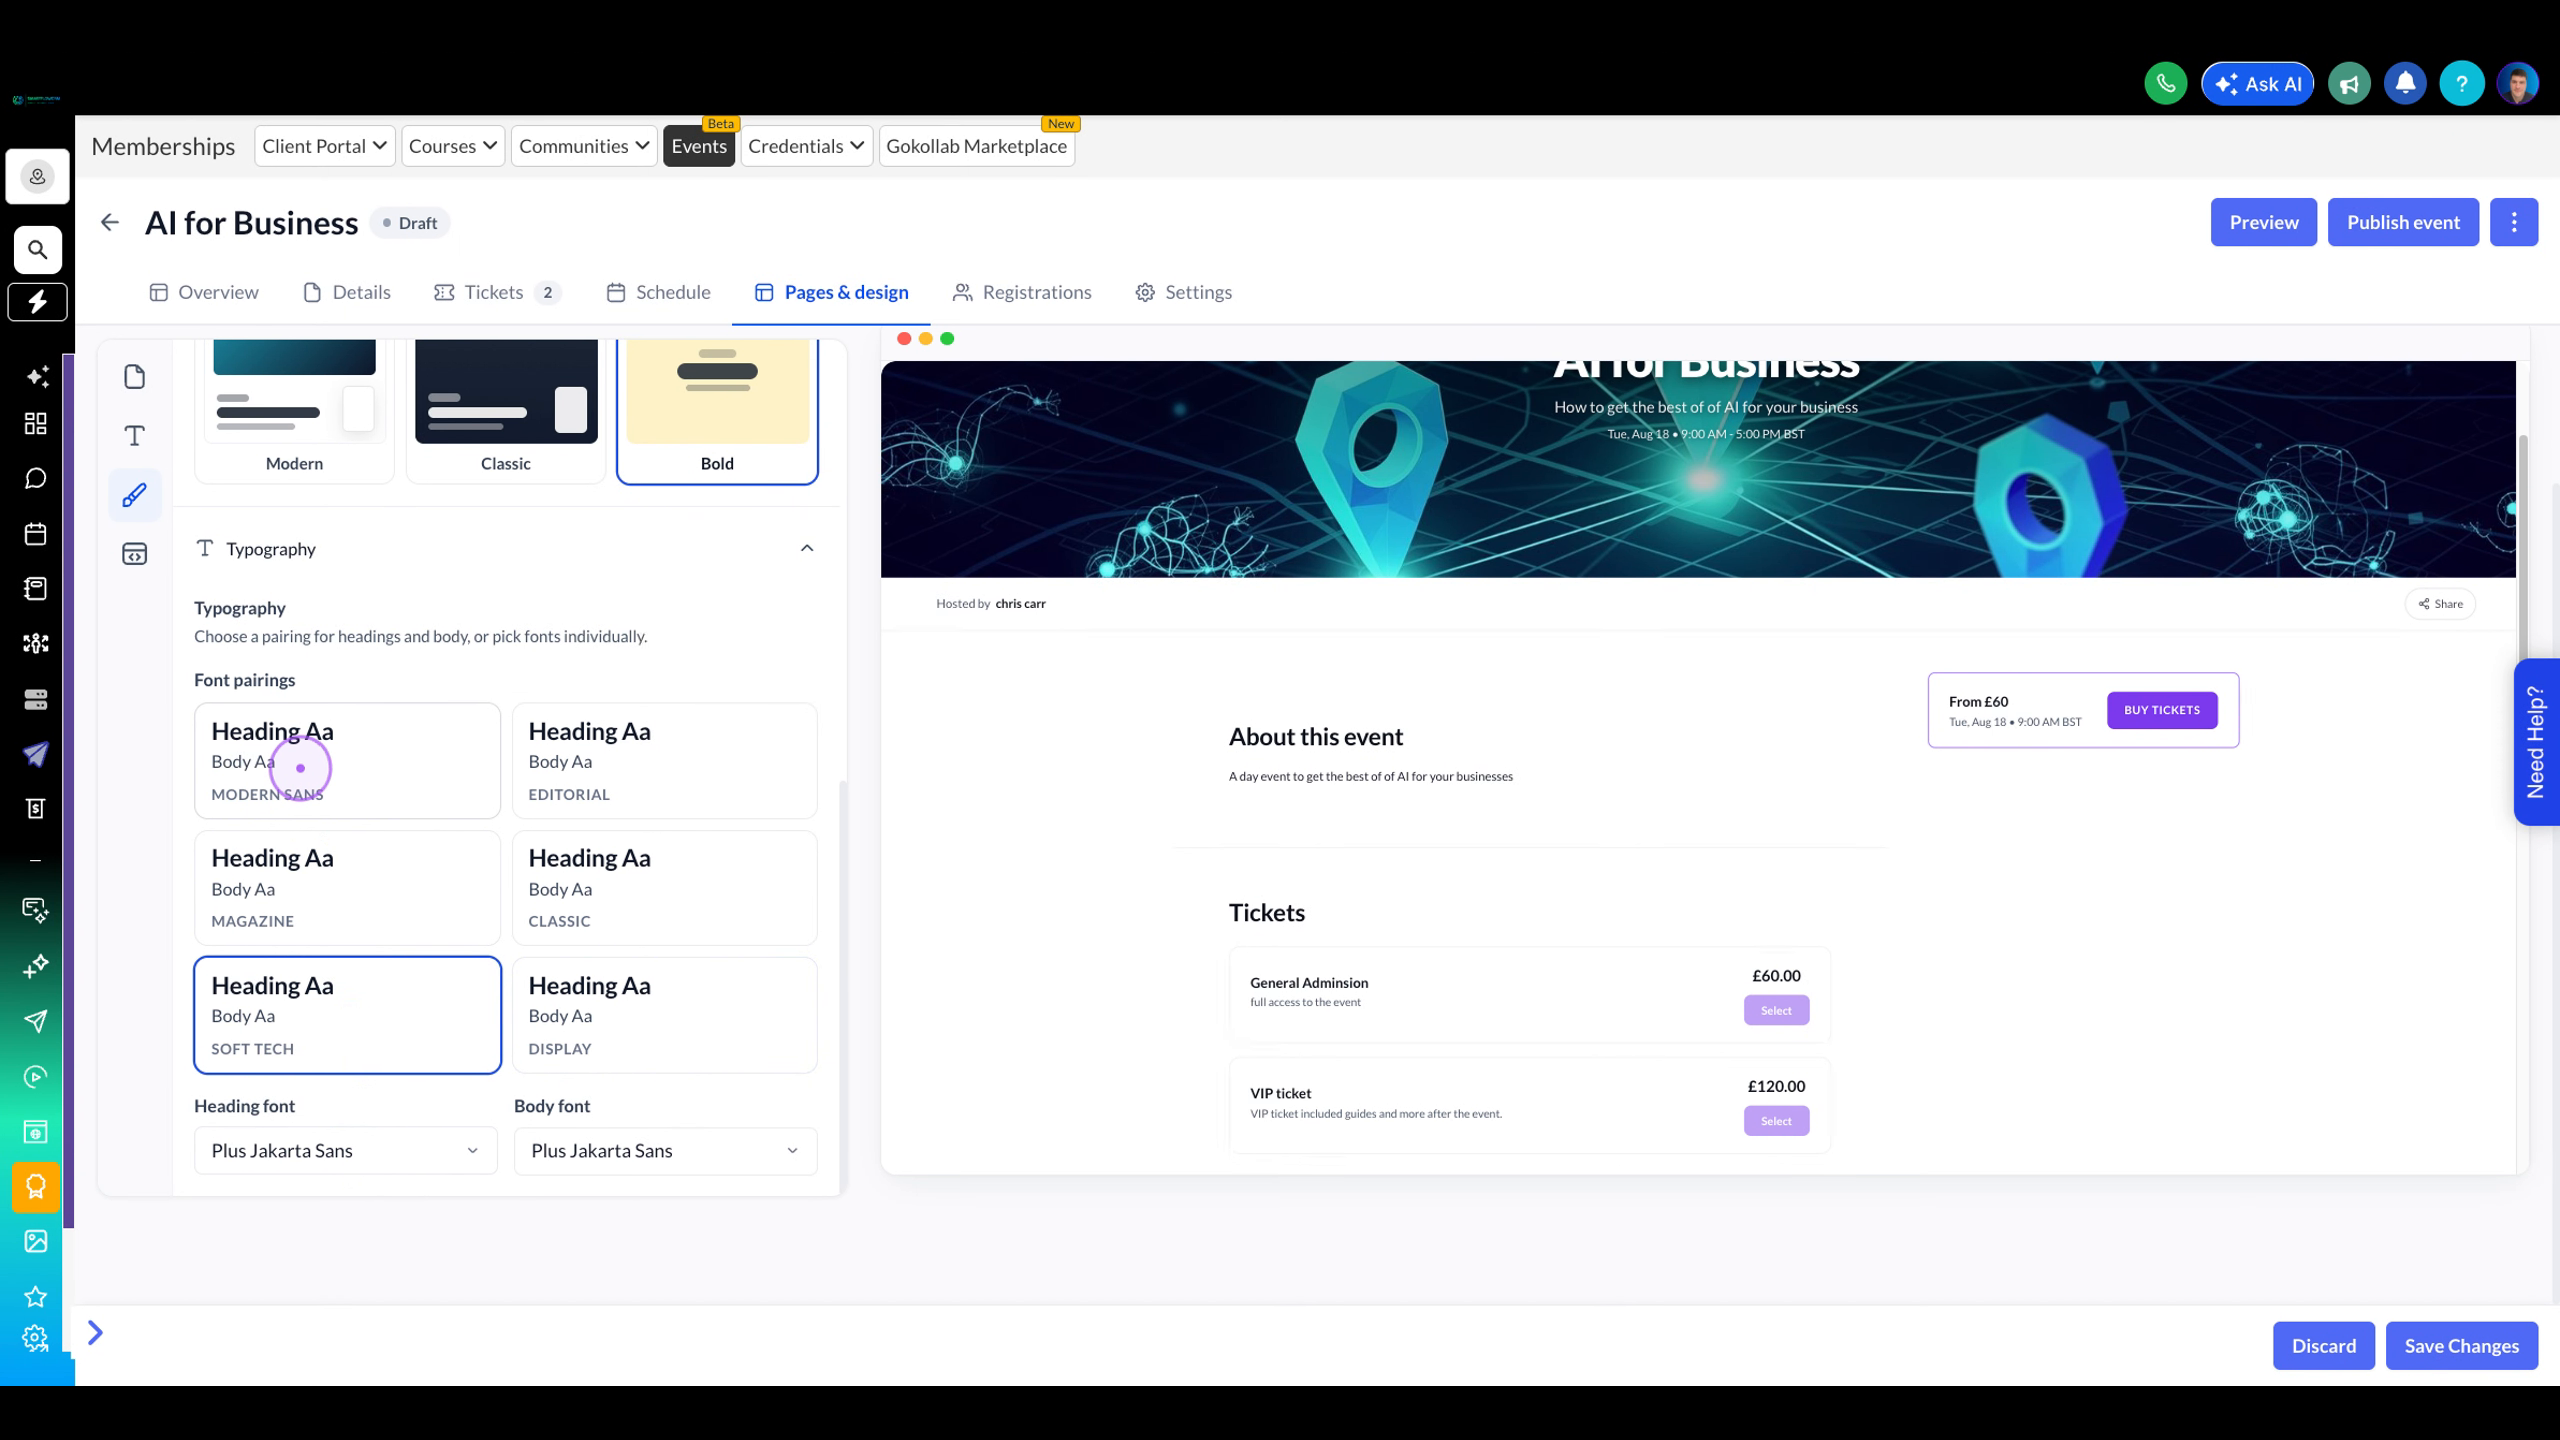
Expand the Typography section to choose font pairings for headings and body text. Select from pre-designed combinations like Modern Sans, Editorial, Magazine, Classic, Soft Tech, or Display.
Click the Save Changes button in the bottom right corner to apply all your design modifications. A confirmation message will appear when saved successfully.
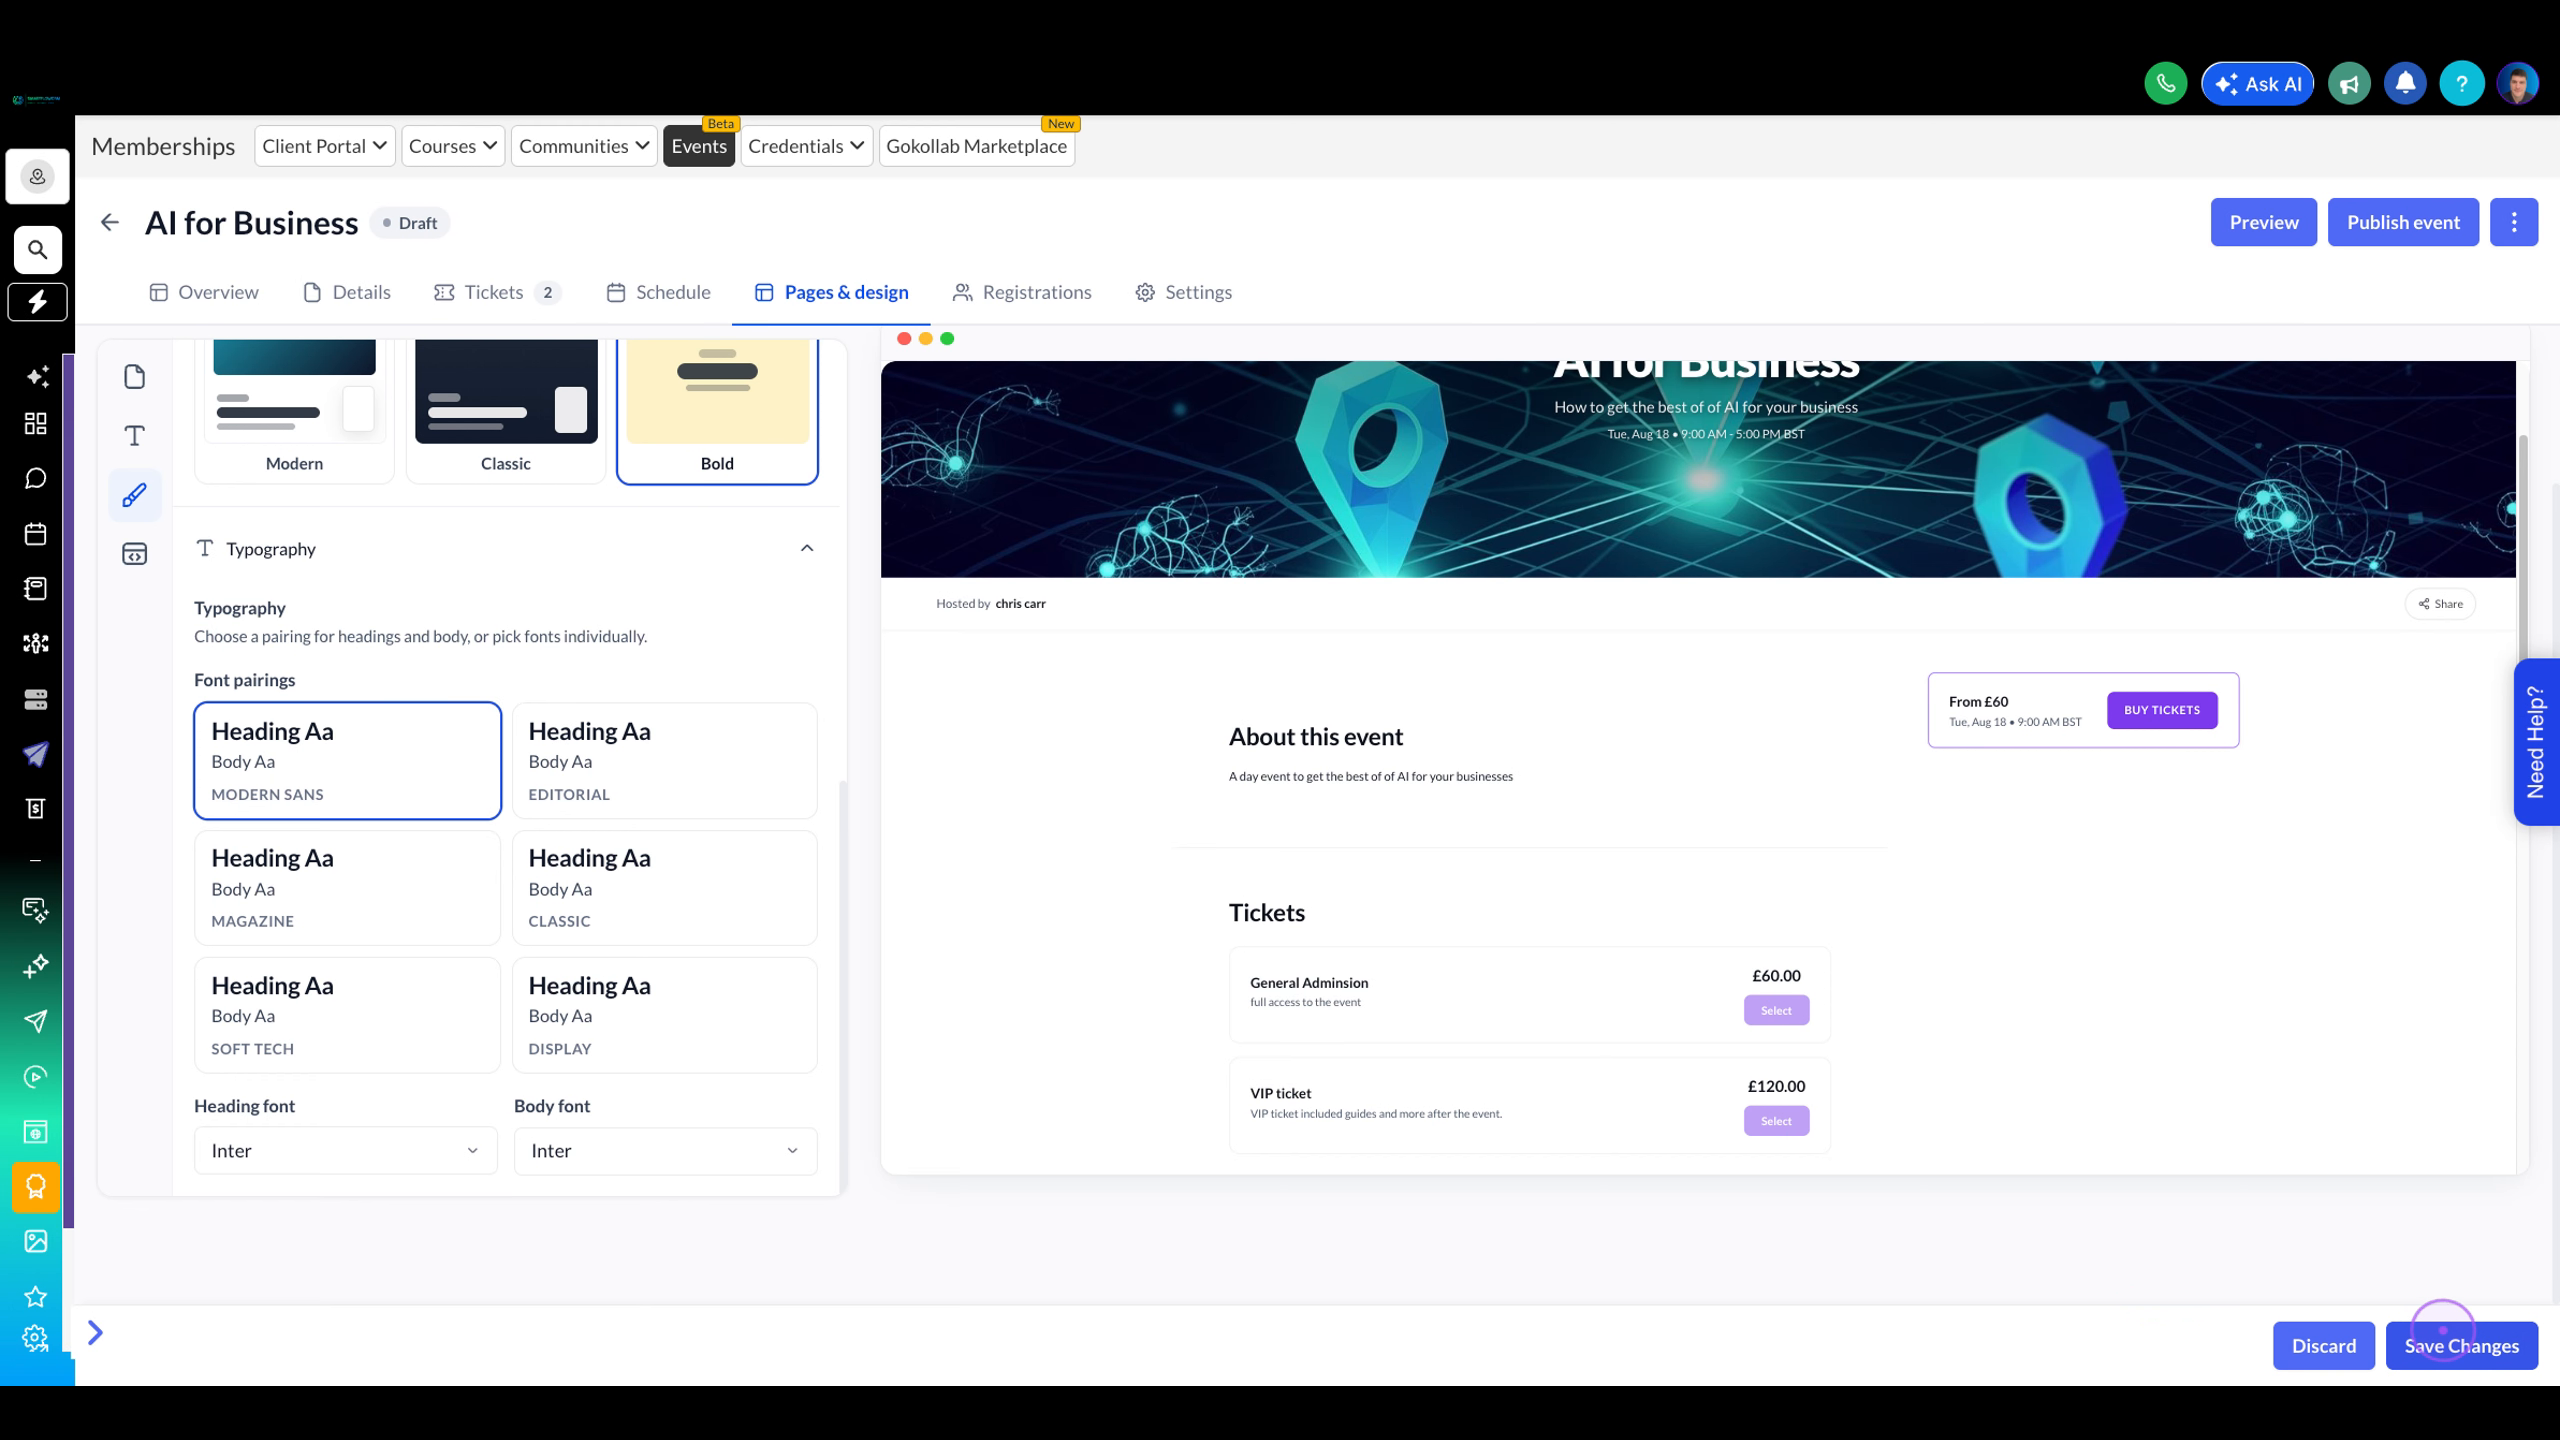
Tip: All design changes apply to your event details, schedule, and registration pages. Use the preview panel on the right to see changes in real-time before saving.